How to Record Twitch Stream Online Gaming on Windows
Twitch is a very big popular online streaming platform for Gaming play and social connection. People can find a lot of interesting things and friends in this place. Also, if you want to save some live streams for later, it is best for you to record the channel content you like. Here in this post, we will guide you on how to record Twitch stream online gaming on Windows in the following four ways:
🎯Screen Recording Software–WorkinTool VidClipper and VLC Media Player
🎯Built-in Feature–VOD
🎯Online Screen Recorder–FlexClip
Please feel free to try all the aforementioned methods. However, please pay particular attention to WorkinTool VidClipper. It is a professional video recorder. And it provides free trial without watermarks. Now, please go download and experience the magic now.
How to Record Twitch Stream Online Gaming on Windows | 5 Ways
Twitch, as one of the most popular live-streaming video platforms for gaming, play, and social connection, is always fond of gamers for interesting content and useful tutorials. As you should know, the highest peak Twitch stream viewers are 2.47 million concurrent viewers per streamer. Because of the various gaming content that it brings, people get used to thinking of it as online TV for games. Especially now that the epidemic is raging and everyone is working from home, Twitch is on fire more than ever. But what if you don’t get the chance to watch your favorite channel then what? Well, how about finding a way to record Twitch stream and save it for later?
Well, we all have situations where we miss our favorite shows for some reason. It’s just gone from a TV show to an online live webcast. It doesn’t matter. In this post, we will provide you with the best solutions to record Twitch streams with Twitch stream recorders. We hope you enjoy the content we present you with. Check it out.
How to Record Twitch Stream with Screen Recording Software
📌How to Record Twitch Stream with WorkinTool VidClipper
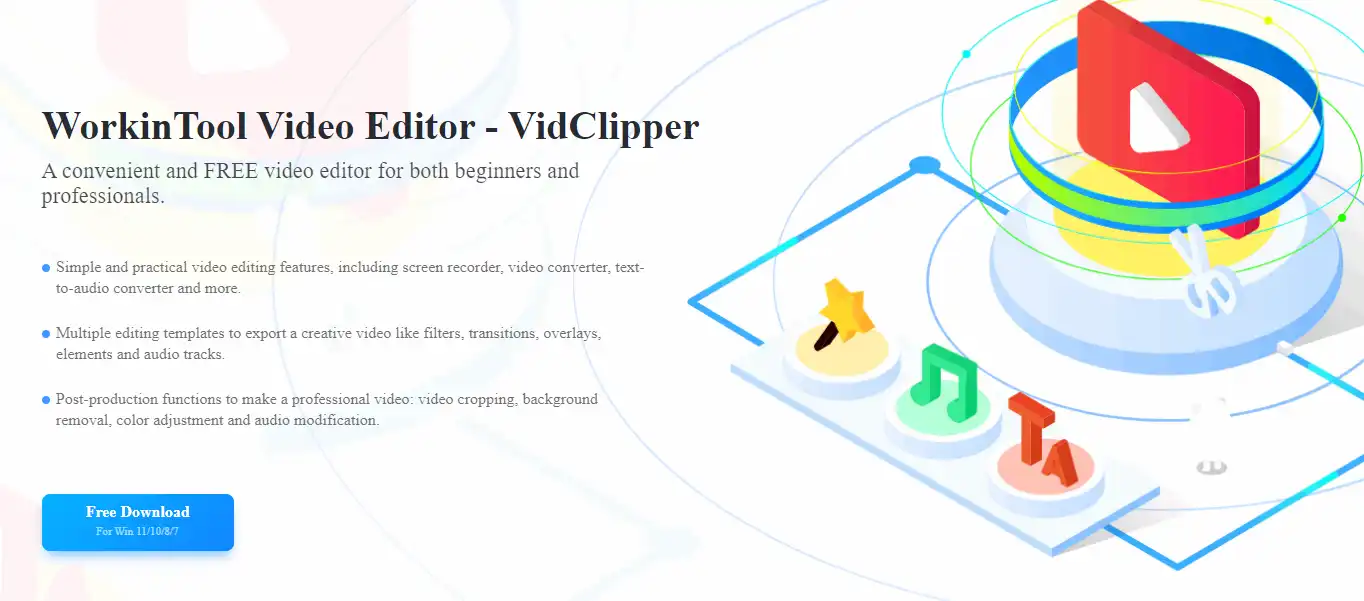
WorkinTool Video Editor – VidClipper is the top option we want to share with you. It is a very powerful Twitch stream recorder. There won’t be any time limit or watermark on your video recording when it is finished. It allows users to capture a full-screen recording with audio or just a partial area of the screen to record. Plus, you can decide where the audio channel comes from and the quality and format of your exports.
Unlock all its features to enjoy the same editing experience as other tools with a much cheaper price now.
Now, come with me to see how to use it to record an amazing Twitch stream gameplay.
📚 Specific Steps to Make It Work
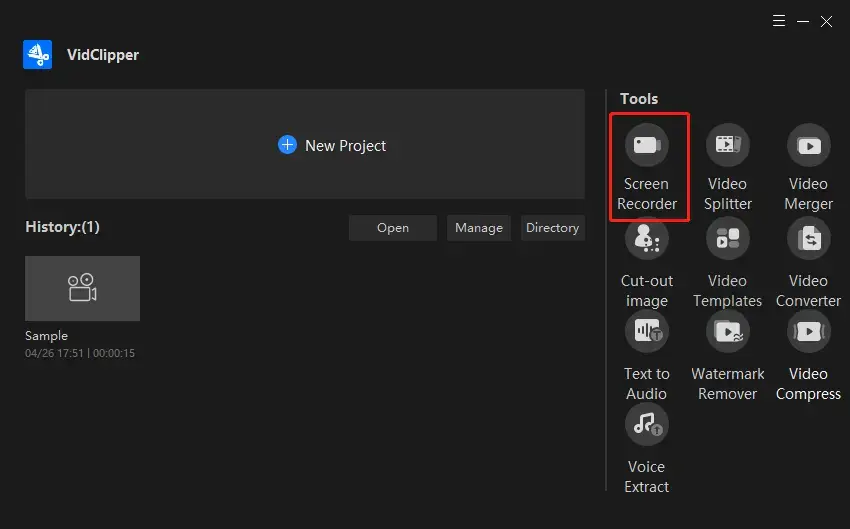
1. Go to the Twitch channel you want to record, launch WorkinTool VidClipper and then click Screen Recorder to open the screen recording page.
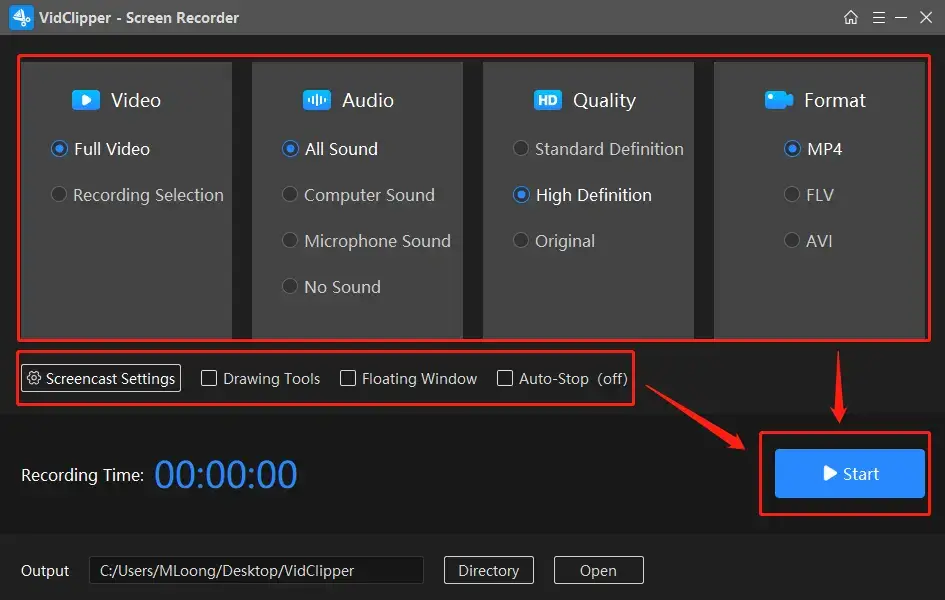
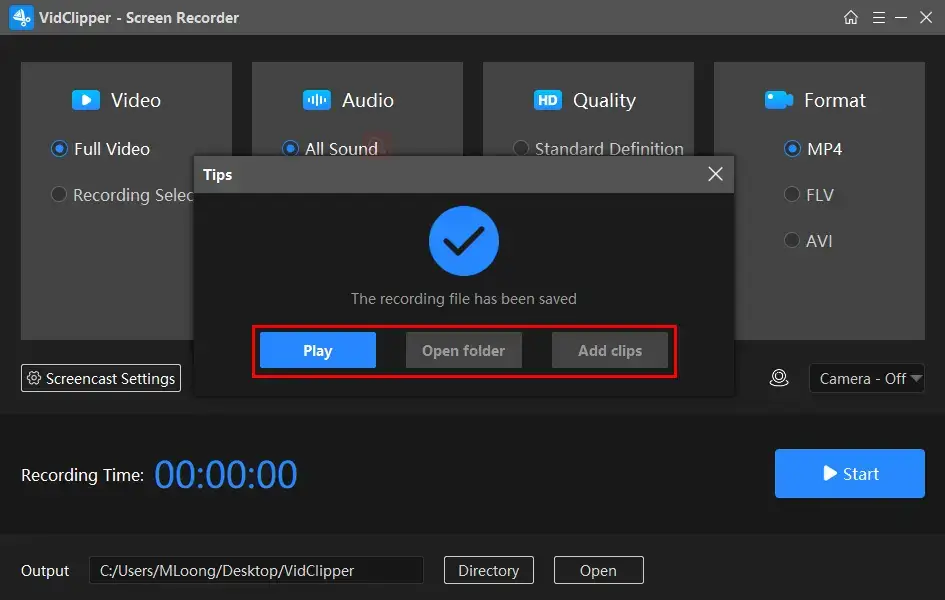
2. Configure your recording screen custom buttons. Here you need to customize your screen record settings according to your demands. There are four basic recording options for users to decide on.
🎉 Basic Recording Options 🎉
| Video | Audio | Quality | Format |
Full Video:Choose this and you will have a full-screen recording immediately starting right after clicking the button. It will have all the elements that your screen displays. Recording Selection: This mode allows you to customize the screen area that you want to record. When you click start, only the selected area of your screen will be included in the video recording.
|
All Sound: This includes all the audio sound that your computer has played. There will be sound from your microphone, gameplay sound, and computer hint sound. Computer Sound: If you decide on this model, only computer sound will be recorded in the video. The peripheral equipment won’t be a part of it. Microphone Sound: No gameplay sound effects or computer hints will be recorded other than your microphone voice. More suitable for the use of teaching video broadcast recording. No Sound: Select this option and your video recording will become completely muted the whole time. |
Standard Definition: Standard video definition for 720P. AKA 1280×720.(fewer than one million pixels when multiplied) High Definition: A higher definition for video exportation. 1080P AKA 1920×1080. (about 2 million pixels) Original: You can keep the exact aspect ratio of your original video by choosing this option. |
MP4: Set your output video format as MP4, suitable for lossy videos. FLV: Make the exported video recording in FLV format, good for short clips. AVI: Convert the screen recording video with audio to AVI format, fit for large and lossless videos. |
3. Once you have set up these buttons, hit Start to record right now.
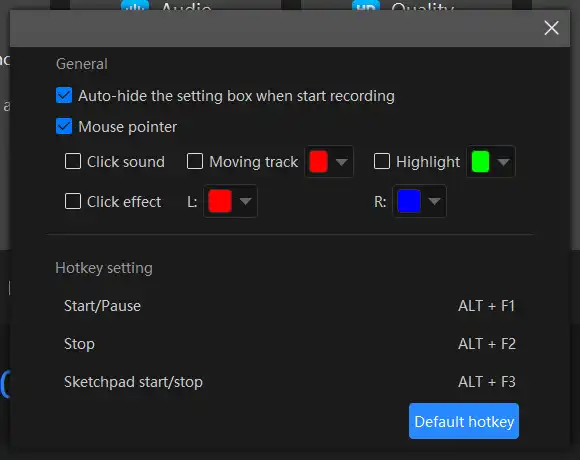
(Or you can directly use the hotkey ALT+F1, ALT+F2 to start/suspend/stop the recording.)
4. Once you have finished recording the Twitch stream, you can click the button or use the button to stop recording.
📢PS: You can make further editing for your recording by clicking Add clips in the window to notify that your recording is saved.
Additional Options
In addition to the basic recording features that we have mentioned above, there are some extra advanced options that you might be interested in. This includes mouse settings and automatically records the Twitch stream function.
- Auto-Hide: You can hide the setting box by selecting this option.
- Mouse Pointer: This section allows you to control the mouse point settings so that you can add clicking sound, add color to the moving trance and highlight the mouse pointer.
- Click Effect: Set a color effect when you left-click or right-click your mouse during the recording.
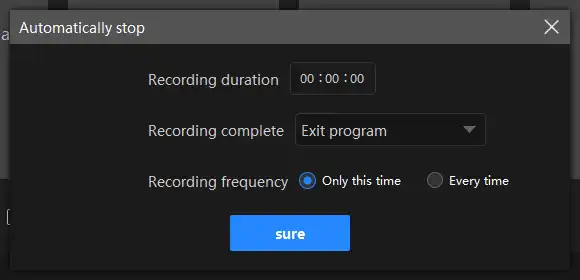
Automatically stopping is also on the menu waiting for you to experience it.
- Duration: You can make a duration time, and when the time has come, the recording will stop automatically.
- Recording Complete: A simple setting to control your computer to “Do nothing”, “Exit program”, “PC sleep” and “PC shut down” when the recording is over.
- Recording Frequency: You are allowed to make it a regular setting for recording, there are “Only one time” and “Every time“.
🎉 More VidClipper Features 🎉
✨Our Verdict
📌How to Record Twitch Stream with VLC Media Player
Another useful software you can expect is VLC media player. VLC is a multimedia player and also a screen recorder that can display network streams and capture them. If you already have VLC on your computer then you can directly try to use this simple tool to make a Twitch video recording. But the function is a little harder than a traditional Twitch recorder. Just follow me and see how it works.
📓 Instructions to Record Twitch by VLC
1. Go launch VLC > “View” > “Advanced Controls.”
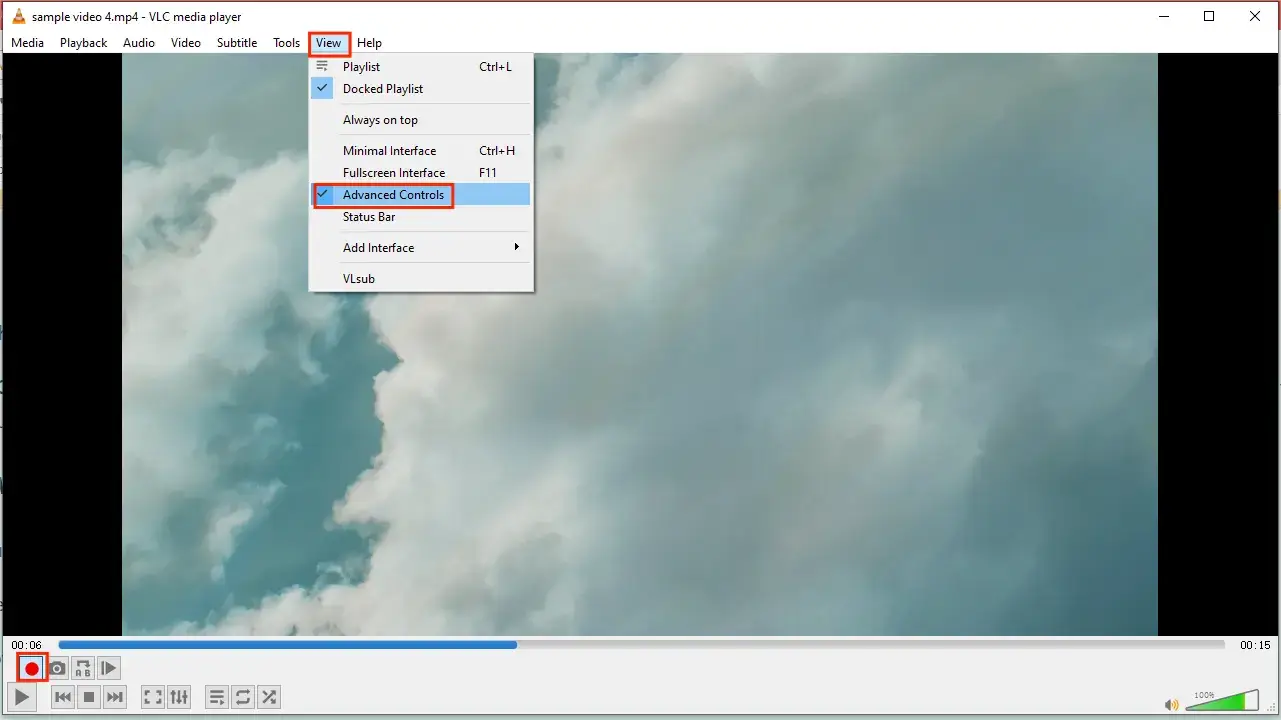
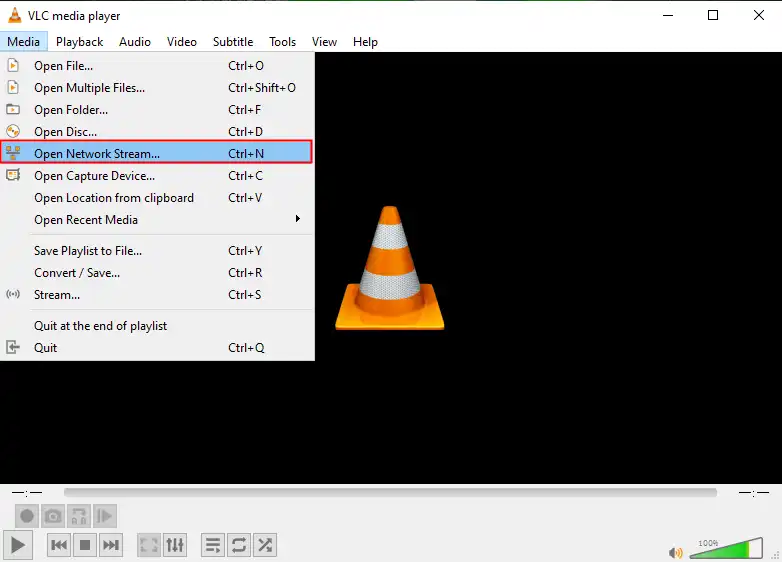
2. “Media” > “Open Network Stream” > enter the direct URL to the network stream in the “Address” > “Play“.
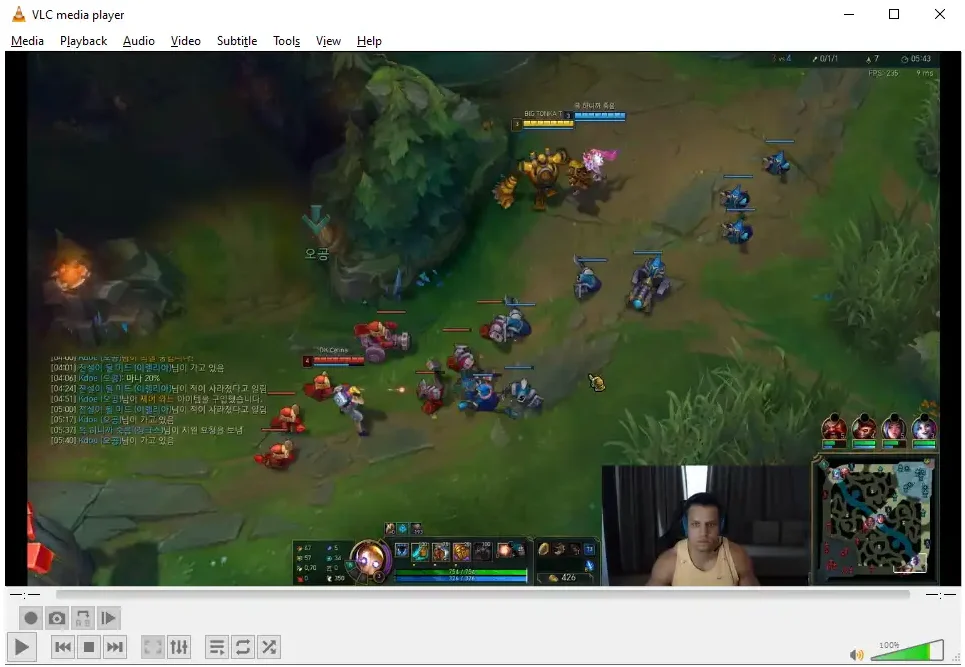
3. “Record” > start to record the stream. When you finish recording, just click “Record” again.
✨Our Verdict
How to Capture Twitch Stream with Its Built-in Recording Feature
📌How to Save Streamer Previous Content – VOD
Video on Demand aka VOD is a video recording system that Twitch has built for streamers who want to save their streams into videos and share them with people who don’t have time to watch streams. These videos can be downloaded to a computer or uploaded to other online platforms like YouTube.
However, it is only for streamers to record their own channels. The settings can be a little bit complex. If you are a viewer and you want to record Twitch stream, it is best for you to check other methods that we have mentioned above.
- You will need to log in to your Twitch account >”Creator Dashboard.”
- Then, navigate to “Preferences” > “Channel” > “Profile” > “Settings” > “Channel and Videos“.
- Turn on the “Store Past Broadcasts” button.
- Then, go to “Content” > “Video Producer” > “Download” your videos.
✨Our Verdict
How to Record Twitch Stream Online
📌 How to Make a Recording of Twitch Stream Through FlexClip
A free online screen recorder will be suitable for those unwilling to install and use any desktop software. What’s also good about it is that you can use it on any platform when internet access is available. Here, we will introduce you to FlexClip.
FlexClip is a useful and free online video solution provider. With its tool–Screen Recorder, you can easily capture your computer screen, be it a desktop window or a web tab. What’s more, there will be no watermark on your output. However, limitations apply to its free version, including limited video quality, project storage numbers and more.
Here is a tutorial on Twitch stream recordings via FlexClip.
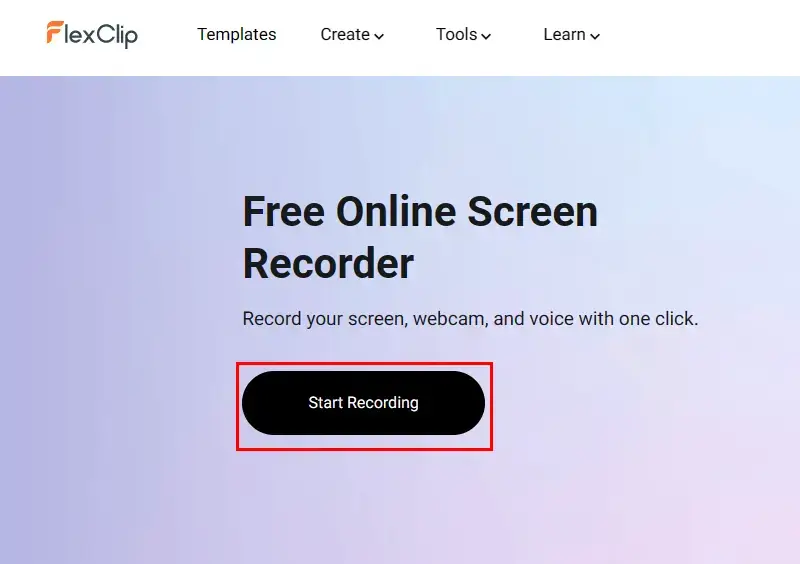
1). Open FlexClip tool–Screen Recorder and then click Start Recording.
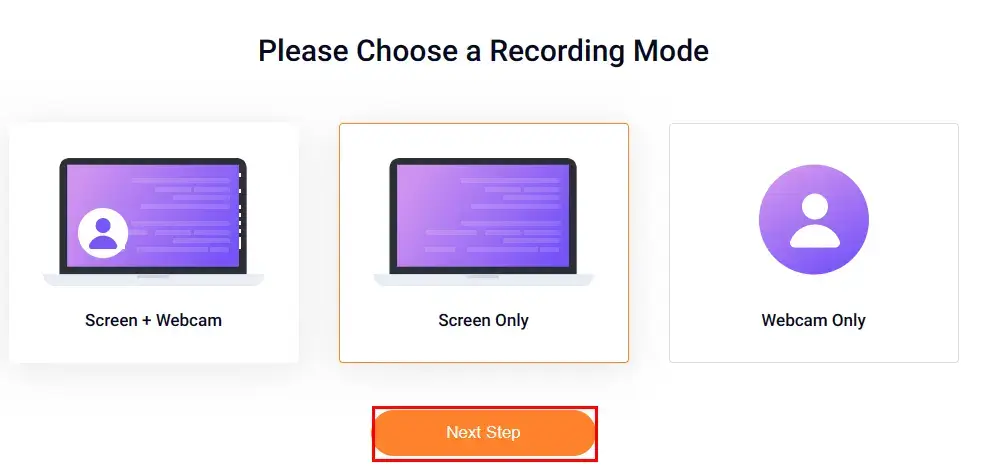
2). Select a recording mode—Screen+Webcam, Screen Only or Webcam Only and then hit Next.
3). Complete the audio settings–Microphone+System audio, Microphone, System audio and No audio.
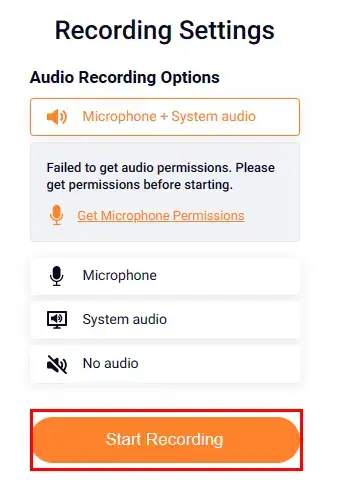
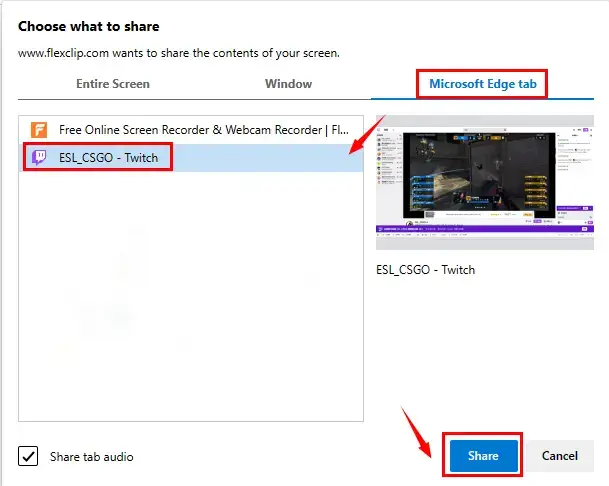
4). Determine the screen content to share with FlexClip screen recorder and then click Share to start your recording automatically.
(Here, you can choose Tabs > Twitch website > Share.)
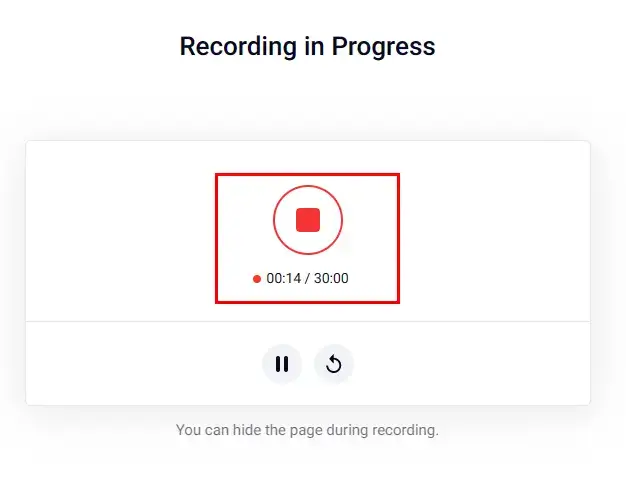
5). Use the Pause or Stop button to temporarily or permanently end your recording.
6. Click Download and Edit to get your Steam game recording.
(Default video format: .wbem)
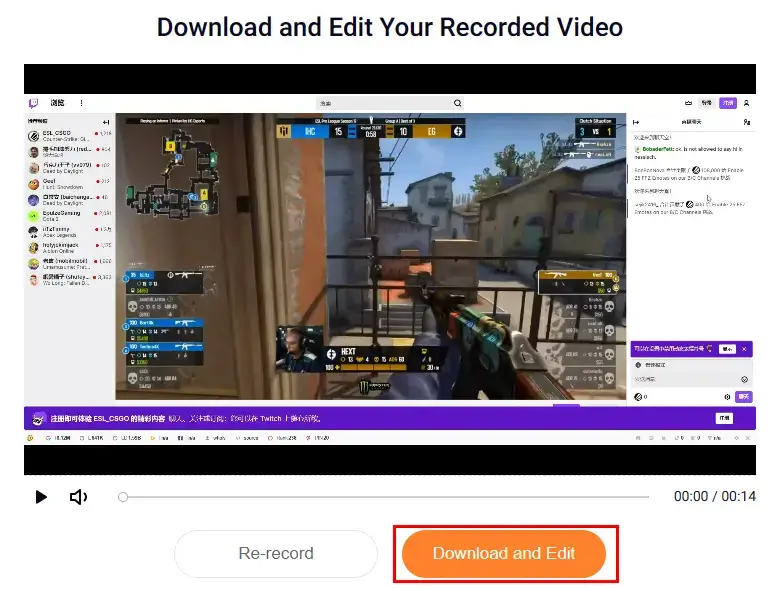
📢Note: Your recording will be automatically added to its online editing console for further editing once you perform this operation. You can close this window if you don’t have this need.
✨Our Verdict
More to Share
In conclusion, we have provided you with four methods and Twitch stream recorders to capture the content that you want to record on the Twitch stream. You can pick one that suits you best. However, we promise that all these approaches will be usable after testing. For PC users, we highly recommend you try WorkinTool VidClipper, you will be amazed at how fascinating this tool is after you have tried it. Now, go download and experience the magic yourself.

