How to Record Screen in Windows 10: Methods and Tips
💥In today’s digital world, screen recording has become a must-have tool for our daily activities. Whether you’re creating tutorial videos, sharing thrilling gaming moments, or documenting meeting details, a good screen recording tool can greatly improve your efficiency. 🔔This article offers a detailed guide on how to record your screen in Windows 10 and introduces four reliable screen recording tools. Our goal is to help you easily master screen recording skills and enjoy a more convenient and efficient digital life.
📌Software: WorkinTool RecWit, VidClipper
📌Websites: Loom, ScreenCapture
👀Now, please continue reading below.
How to Record Screen in Windows 10: Methods and Tips
🤔Have you ever lamented missing out on a brilliant explanation in an online course? Regretted not saving that game-winning highlight? Or felt frustrated when you couldn’t visually demonstrate complex operations during a work presentation? Let these regrets be gone! 📢As a widely used operating system, Windows 10 not only boasts powerful built-in recording capabilities but also accommodates numerous third-party screen recording tools. Whether you’re a novice or an experienced user, mastering these functions will be a breeze. 🔎Next up, I’ll dive into how to record screen in Windows 10, bid farewell to missed opportunities, and start capturing every wonderful moment of life and work!
✨ Windows 10 Built-in Screen Recording Feature
This feature is known as the “Xbox Game Bar” and is compatible with Windows 10 and later systems. You can activate it by pressing the shortcut “Win + G” or start recording directly with “Win + Alt + R“. If the shortcuts don’t respond, you may need to enable the feature in your computer’s “Gaming” settings.
During recording, the “Capture Status” window will show the duration in real-time. You can also configure settings for the microphone, audio, and shortcuts. After stopping the recording, you can playback the video in “See my captures,” where you have options to delete, share, or perform other actions.
✨ Recommended Third-Party Screen Recording Software and Tools
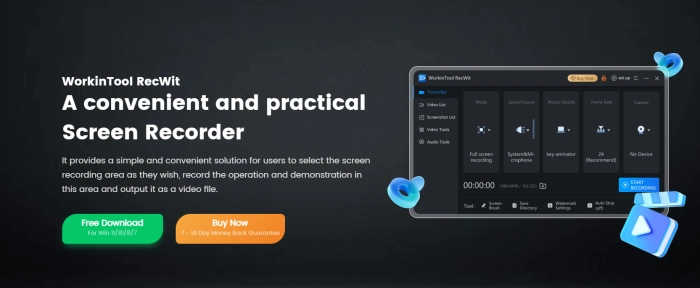
🥇WorkinTool RecWit
WorkinTool RecWit is a convenient and practical screen recording software that supports various recording modes, such as full-screen, specific region, and game recording, to meet different scenario needs. It also includes a rich set of built-in video and audio tools, making post-recording editing and optimization easier.

◾Step 1: Visit the official website, download, install, and then open the software.
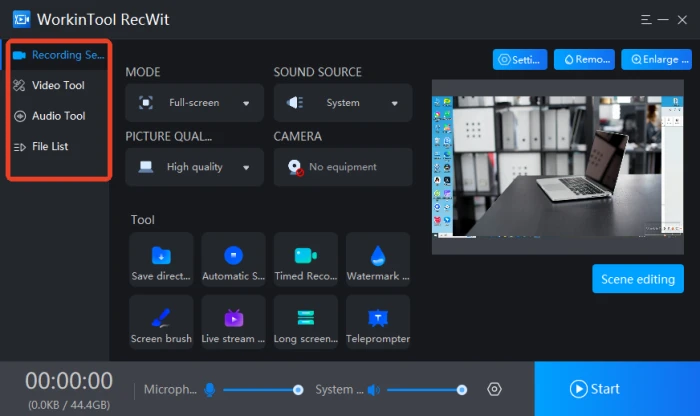
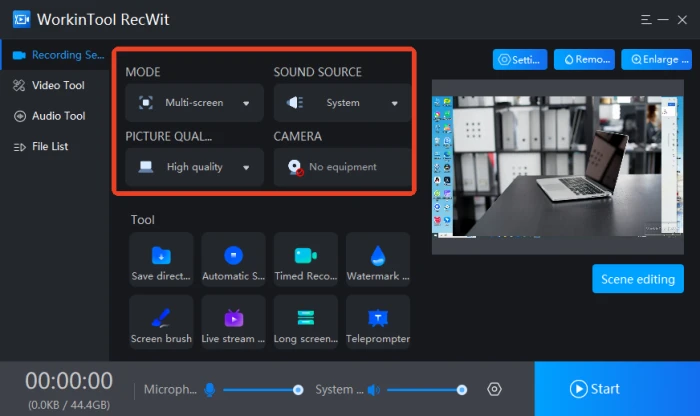
◾Step 2: Select the recording mode and set the sound source, picture quality, and camera as needed.
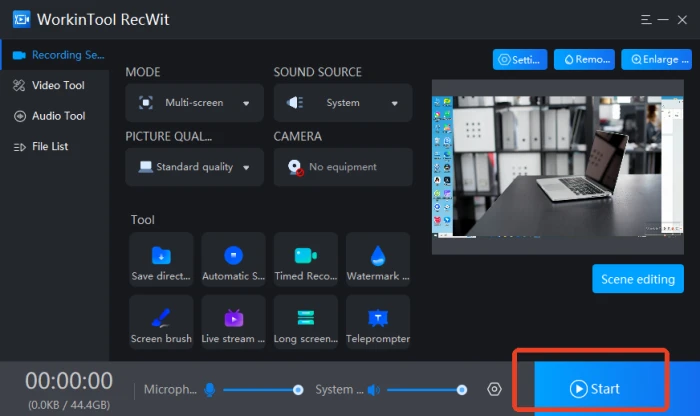
◾Step 3: Press the “Start” button or use the default shortcut “Alt+F1” to begin recording screen activity.
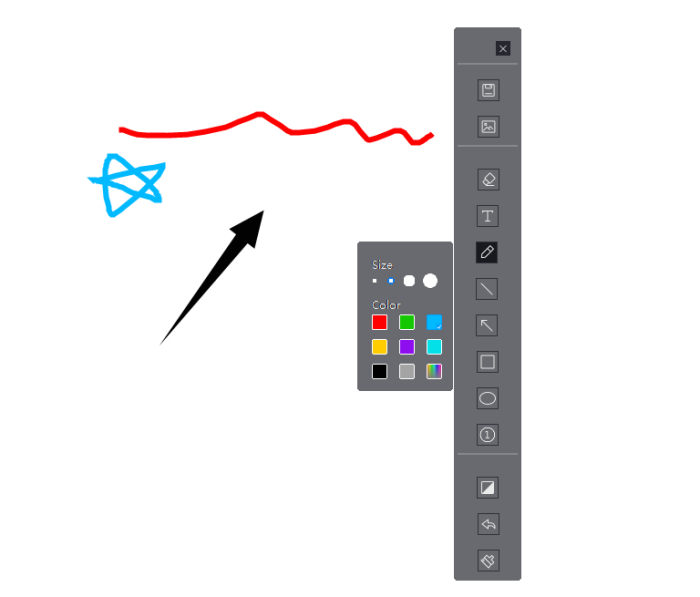
◾Step 4: Use the built-in screen brush to add annotations, insert images, and perform other editing tasks during recording.
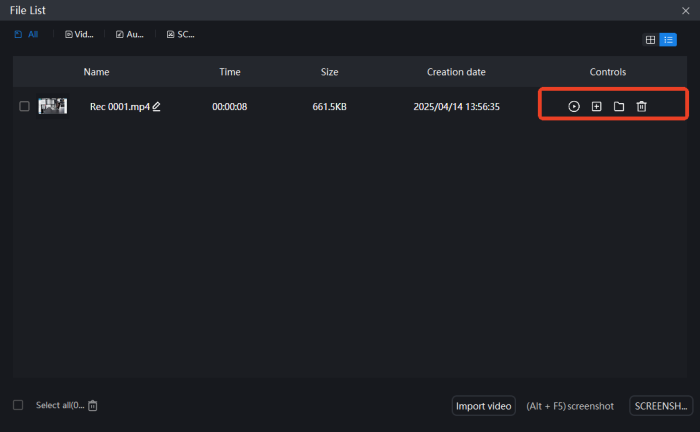
◾Step 5: Press the default shortcut “Alt+F2” to end the recording. The file will be automatically saved to the “File List”, where you can play, delete, or manage it.
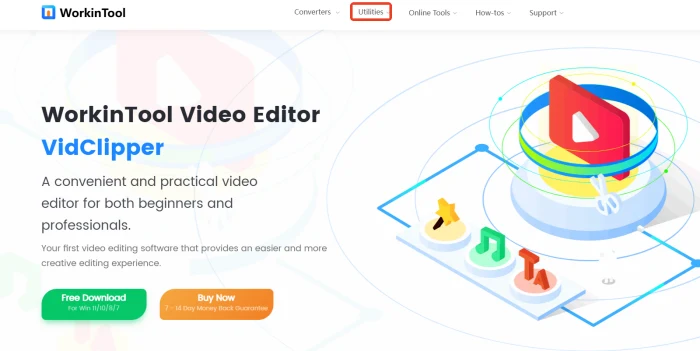
🥈VidClippe
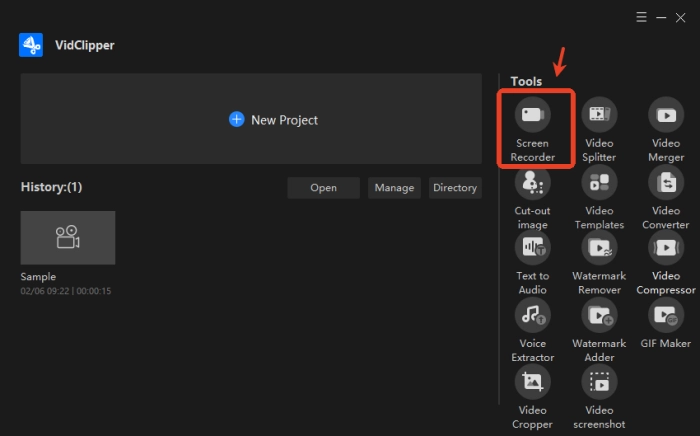
VidClipper is a professional video editing software with a clean and intuitive interface, making it easy for even first-time users to get started quickly. It integrates various practical tools, including screen recording, and supports high-definition screen content capture, which is suitable for diverse scenarios.
◾Step 1: Download and install the software onto your computer, then open it.
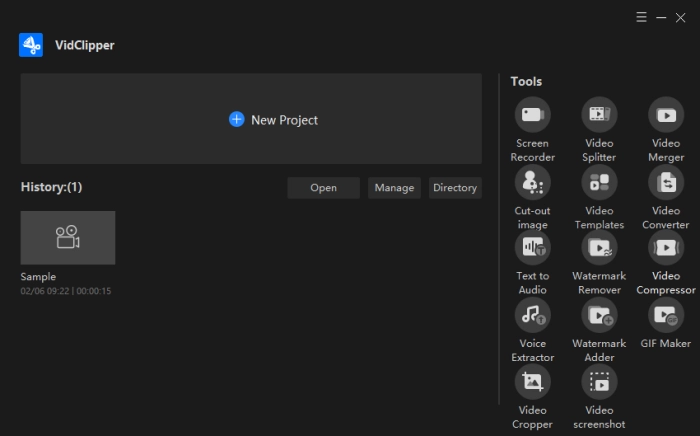
◾Step 2: Click on【Screen Recorder】 in the toolbar on the right side of the interface.
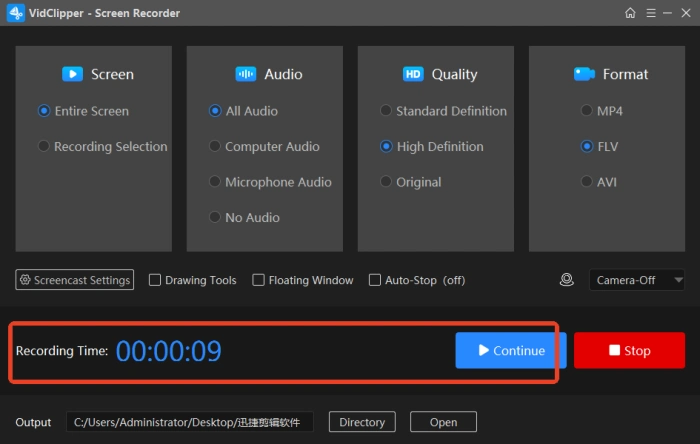
◾Step 3: Configure settings for Screen, Audio, Quality, and Format according to your requirements.
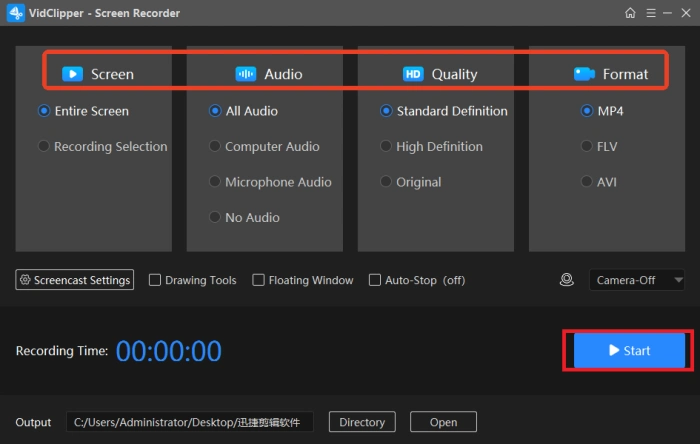
◾Step 4: Press the “Start “ button. You can pause or resume recording at any time.
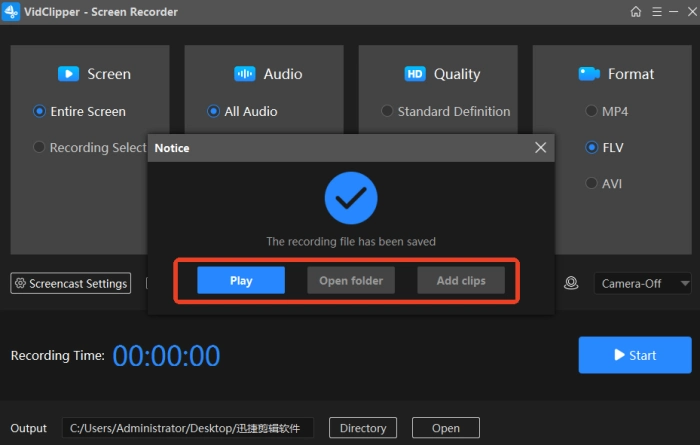
◾Step 5: After stopping the recording, the file will be saved automatically. You can play it instantly or add it to your editing materials with one click.
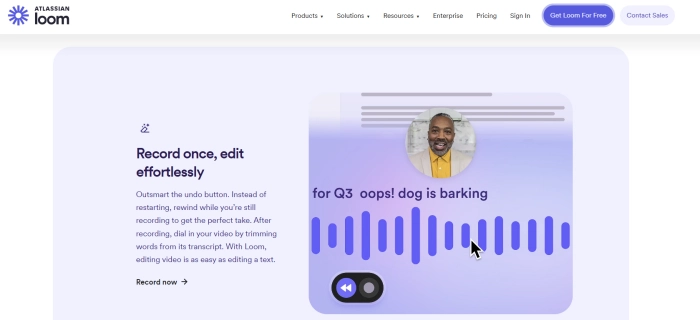
🏅Loom
Loom is an online screen recording tool accessible via a Chrome browser extension or through desktop and mobile applications. It facilitates the entire workflow from recording to sharing and is widely used in various scenarios, such as remote collaboration and online education.
After registering or logging in to your account, select the recording area and optionally enable the microphone and camera. You can pause or resume the recording at any point. Upon completion, the video is automatically saved to the cloud, and a shareable link is generated, enabling efficient content creation and distribution.
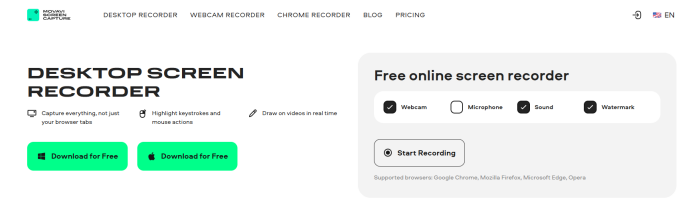
🏅ScreenCapture
ScreenCapture is an open-source screen recording tool that provides a variety of practical features to cater to diverse user needs. It offers features such as multi-screen capturing, window highlighting, color picking, real-time editing, and desktop pinning, addressing users’ needs ranging from basic capturing to complex annotations.
First, search for and visit its official website using a browser, and then decide whether to enable the webcam and microphone based on your needs. After setting the desired recording mode, you can start recording, with the option to pause and resume at any time. Once the recording is complete, it will be automatically saved and a download link will be provided.
💡 Tips for Enhancing Screen Recording Quality
|
🎊 Outlines |
📍 Descriptions |
| Plan Ahead | Before recording, clearly define the content and sequence you want to present. Creating a simple script or outline can make the recording process more organized. |
| Organize Your Desktop/Window | Close unnecessary applications and notifications, clean up desktop icons, and hide sensitive information to ensure a clean and professional recording environment free from distractions. |
| Test Audio | If recording voice narration or system sound, always test the microphone volume and clarity beforehand. Check if system sounds are too loud or too soft. |
| Conduct a Test Recording | Before committing to a long recording session, record a short segment to check for video clarity, proper audio levels, and smooth operation. This allows for timely adjustments. |
| Pacing and Articulation | If narrating, maintain a steady pace and clear enunciation. Use concise and straightforward language for easy comprehension within a short time. |
| Utilize Mouse Highlighting and Click Effects | If the recording tool supports these features, use them. They help viewers follow your actions more easily and enhance engagement. |
| Post-Editing | Even for simple recordings, trimming the beginning and end preparation times, as well as any ineffective operations or pauses in the middle, can make the video more concise and engaging. |
📝More to Share
🎈This article has detailed how to record your screen in Windows 10, covering both the built-in feature and four recommended screen recording tools. Each tool has its unique characteristics, allowing you to choose based on your specific needs and preferences. 🌈For users seeking a balance between a user-friendly interface and efficient, stable performance, tools like WorkinTool RecWit and VidClipper are compelling options. 🉑Of course, to make your screen recordings truly stand out, mastering practical recording techniques and paying attention to relevant considerations is also crucial. We hope this article provides valuable guidance, empowering users to navigate the world of screen recording with greater ease and proficiency.
Related Article
 WorkinTool Capture Screen Recorder Review: Screen Record Anything
  How to Screen Record on TikTok on Windows/iPhone/Android
  How to Screen Record on Windows | Four Practical Ways to Share