How to Screen Record on Windows 11 | Methods to Share
In the digital age, screen recording has become a common need. 🧐Whether it is a gamer who wants to record the highlights of the moment, a teacher to create teaching videos, or a professional to share the operation process, 🔮Windows 11 provides a variety of screen recording methods to meet the needs of different users. 👀This article will introduce four commonly used screen recording tools:
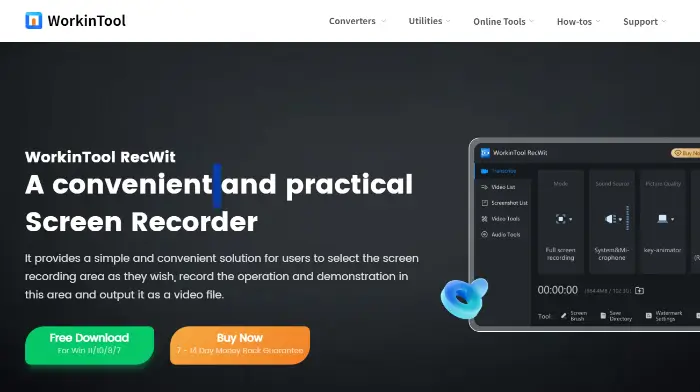
💡WorkinTool RecWit
💡WorkinTool VidClipper
💡FlexClip
💡Xbox Game Bar
It aims to explain several mainstream methods of screen recording on Windows 11 and help you master this practical skill easily.🙋♀️
How to Screen Record on Windows 11 | Methods to Share
How to do screen recording on Windows 11? 🧐Nowadays, screen recording has become an indispensable tool in many scenarios such as work teaching, game sharing, and software demonstration.✨ However, for many users, there are still questions about how to capture screen activities efficiently and conveniently in the Win11 environment.👀 This article will provide readers with a detailed introduction to various methods of screen recording on Windows 11 from multiple perspectives. Help users choose the most suitable tool for themselves, 📢 to enhance the recording experience. Let’s take a look~💡

✨First, multiple choices of Windows 11 screen recording tools
🔎This article will focus on the following screen recording options:
|
By elaborating on the features, advantages, and usage of these tools. 🥳We hope to help you choose the most suitable screen recording solution for yourself according to your actual needs, to enhance your work efficiency and creative freedom.⌛
✨Second, the specific recording tools and operation steps in detail
1️⃣ Use professional screen recording software – WorkinTool RecWit
WorkinTool RecWit is a recommended screen recording software for professional users or content creators who are looking for high-quality recording results, flexible settings, and rich features.
🧡Advantage:
|
🔻Steps to use:
Step 1: Download and install WorkinTool RecWit on your device.

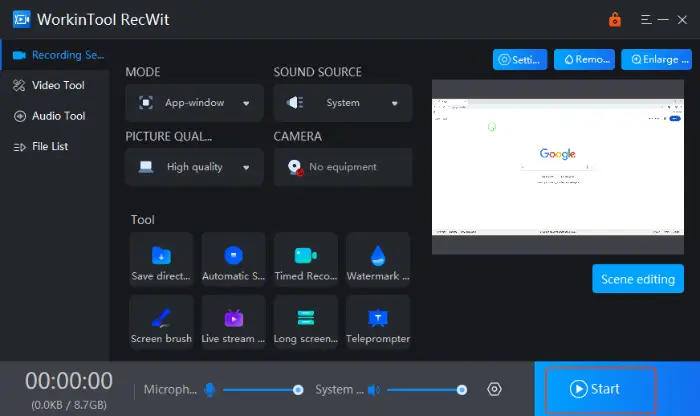
Step 2: Launch the software, in the main interface of the software, according to the recording needs, click to select the corresponding mode, such as “Full-screen“, “Regional recording“, “Game recording” or “Multiscerrn recording”. Game recording” or “Multiscerrn recording“.

Step 3: Before the official recording, we still need to adjust the related settings, such as Sound Source, Picture Quality, etc. Click the corresponding button to quickly complete the settings.

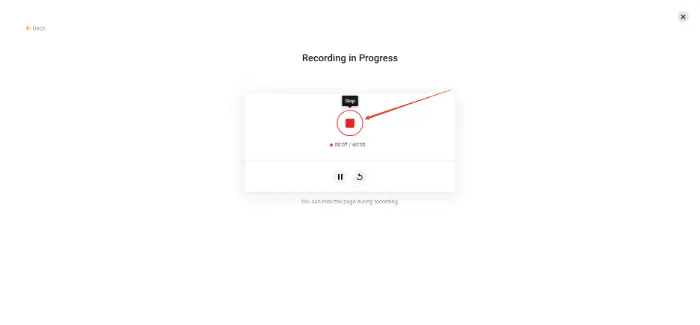
Step 4: After everything is set up properly, click “Start” in the lower right corner of the interface, and the recording will start after the countdown.
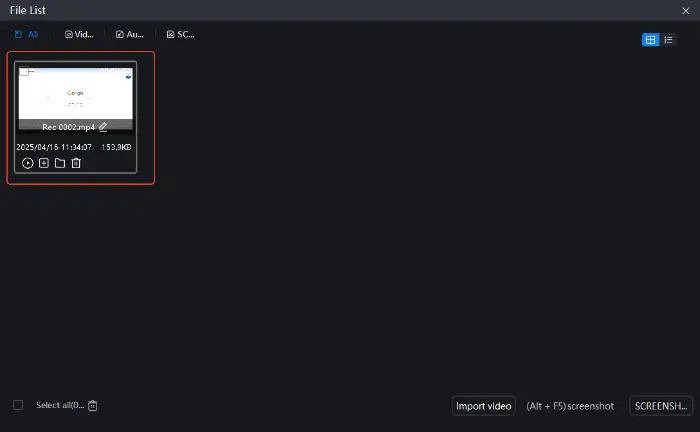
Step 5: Click the square “Stop” button on the hovering toolbar to stop recording. After recording, the software will automatically pop up a file list window. You can preview, rename, or directly open the folder where the recorded video files are located.
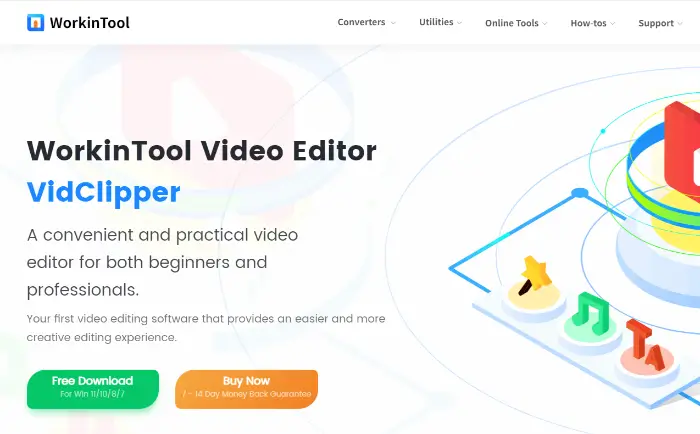
2️⃣ With the help of video editing software – WorkinTool VidClipper
WorkinTool VidClipper is a feature-rich video editing software with a built-in screen recording function, which realizes a fast connection from screen capture to post-production, especially suitable for users who need to process the recorded screen material in depth.
🧡Advantage:
|
🔻Steps to use:
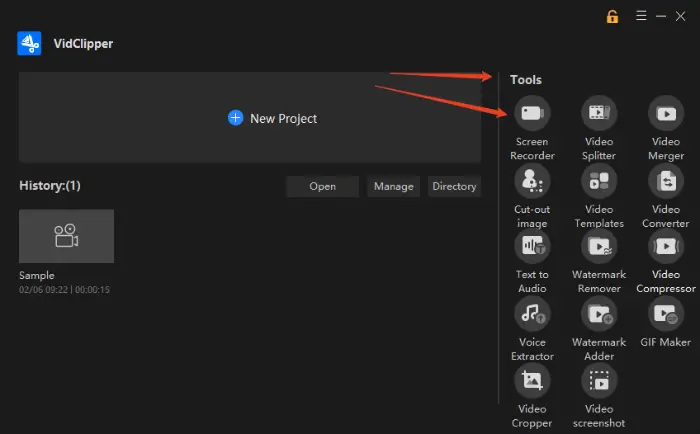
Step 1: Open WorkinTool VidClipper, find “Screen Recorder” in the “Tools” on the right side, and click on it.
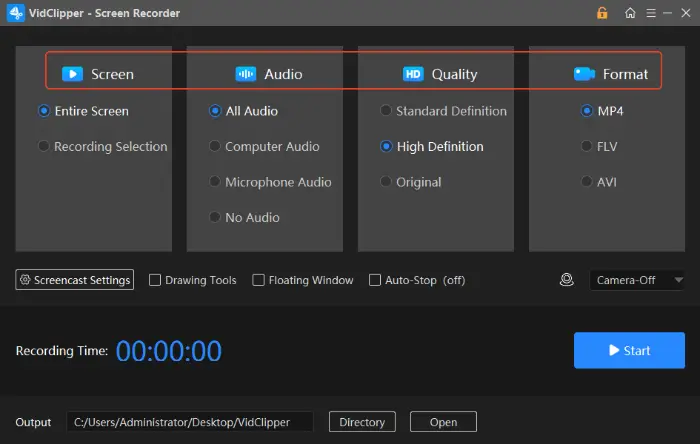
Step 2: In the recording interface, you can adjust all kinds of settings as needed, including “Screen“, “Audio“, “Quality“, and “Format Format”.
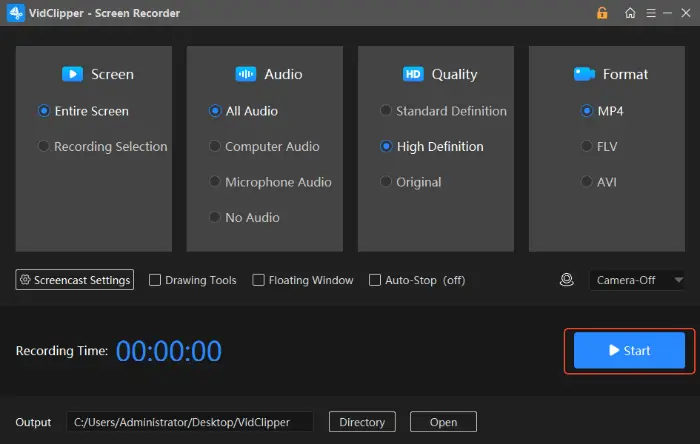
Step 3: Click “Start” to start capturing screen activity.
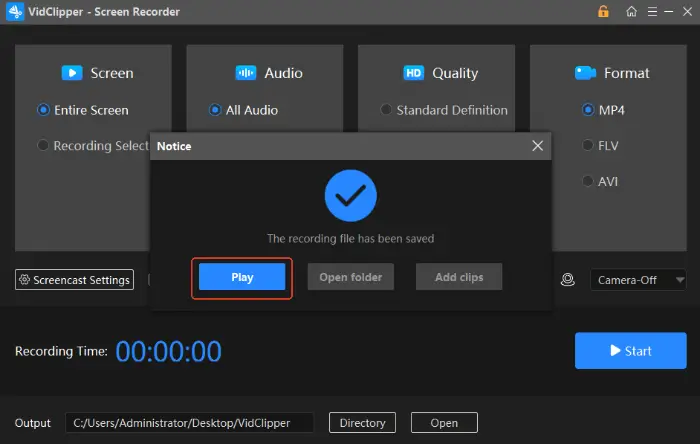
Step 4: Finish recording by clicking the stop button or using the shortcut keys. After recording, click “Play” to view the recorded file directly.
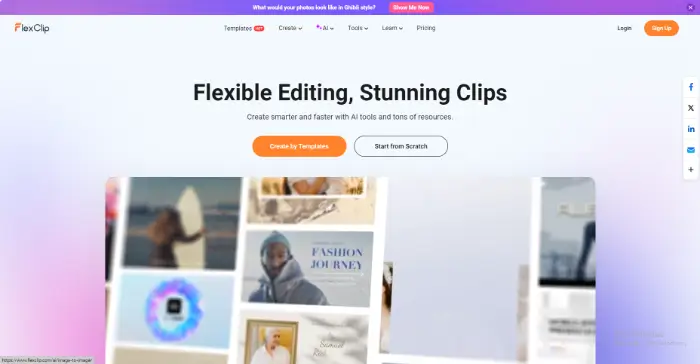
3️⃣ Use the online screen recording tool – FlexClip
If you don’t want to install any software on your computer or need to record screens temporarily on different devices, then an online screen recording tool like FlexClip is a good choice.
🧡Advantage:
|
🔻Steps to use:
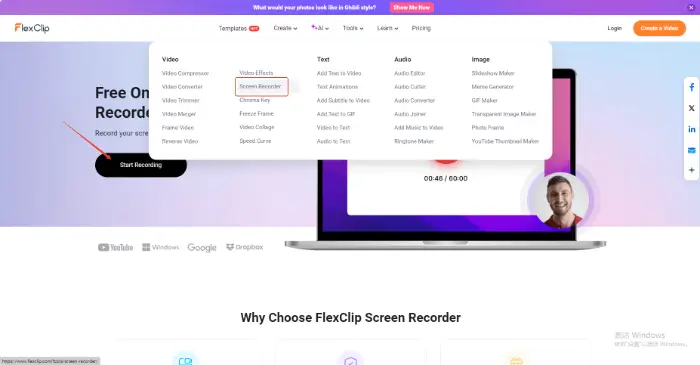
Step 1: In the function bar on the homepage of the website, find the function of “Screen Recorder” and click on it.
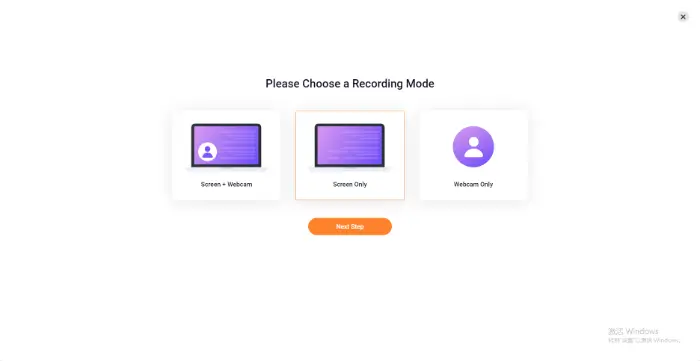
Step 2: Select the appropriate recording mode and then choose whether you need to record system audio and microphone audio.
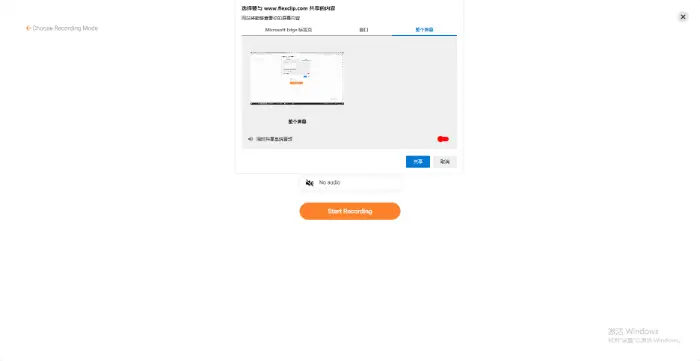
Step 3: Click “Start Recording” to confirm which screen/window/tab you want to share.
Step 4: If you want to stop recording, click the “Stop” button.
4️⃣ Utilize Windows 11 built-in features – Xbox Game Bar
For users who just need to make simple, quick recordings, Windows 11 comes with the Xbox Game Bar, which is a very convenient option. It was originally designed for gamers but can be used to record activity from most desktop applications as well.
🧡Advantage:
|
🔻Steps to use:
Step 1: Press Win + G, the main Xbox Game Bar interface, and several widgets will appear on the screen, find the ” Capture ” widget.
Step 2: In the Capture widget, click the round Start Recording button. If you want to end the recording, you can click the “Stop Recording” button on the screen.
✨Third, how to make a choice?
✅ If you only need to quickly record a program window, you don’t need high image quality. The Xbox Game Bar is the easiest and most straightforward option.
✅ If you need high-quality, multiple recording modes (e.g., region, picture-in-picture), scheduled recording, or real-time annotation capabilities. WorkinTool RecWit is more than capable of meeting your professional needs.
✅ If you need to add special effects to the video after recording the screen. WorkinTool VidClipper‘s all-in-one recording and editing features will greatly enhance your efficiency.
✅ If you don’t want to install any software, or if you need to record on several computers with different systems, and you can accept the possible limitations of online tools. FlexClip offers a convenient online solution.
✨Fourth, the screen recording skills and precautions
| 📍Tips/Cautions | 📝Clarification |
| Setting Recording Parameters | Set the resolution, frame rate, and audio source before recording to ensure that the recording is as expected. |
| Checking the recording area | Ensure that the recording area is correct to avoid recording extraneous content. |
| Attention to document retention | Timely check the save location after recording to avoid file loss. |
| Optimize computer performance | Close unnecessary background programs to ensure a smooth recording process. |
| Backup Recording Files | Regular backup of recording files to prevent data loss. |
In today’s digital era, mastering “how to screen record on windows 11” has become an important skill. 🥳Through the detailed introduction in this article, we have learned about various screen recording tools. 🔮They all have their own advantages and are suitable for different usage scenarios and needs.I hope the introduction of this article can help you easily accomplish screen recording on Windows 11, and improve your work efficiency and creative freedom.🙋♀️
Related Article
 How to Stop a Screen Recording on QuickTime Player | Tutorial Share How to Record Screen in Windows 10: Methods and Tips WorkinTool Capture Screen Recorder Review: Screen Record Anything