How to Change Video Resolution on Windows [3 FREE Ways]
There are many occasions that you might need to change video resolution so that you can get on to your job. Therefore, you have to find the best solution to properly alter video resolution. For this reason, we have provided three different but equally brilliant ways to help you with that. And one of them is to use WorkinTool Video Editor – VidClipper. It is a professional video processing software. With it, you can easily customize your video parameters, including resolution. More importantly, it is totally free to use. So, don’t hesitate now, and go download and experience the magic yourself.
How to Change Video Resolution on Windows
There are occasions you might encounter that you need to change video resolution so you can get on with your work. For example, if you are uploading videos to social media platforms or video platforms like YouTube, then you have to know the video size and resolution limitation for the specific website. For example, some 8K and 4K video clips won’t be allowed to be uploaded to these online platforms. Or like you are about to burn a DVD, but DVD burning requires at least a 720P resolution. If you have 320P or 480P videos, you might need to increase the video resolution first.
In order to solve problems like these, we are here to provide you with three different but equally wonderful Methods to change the video resolution. More importantly, all the approaches are FREE to use and great in quality. Let’s find out together.
The Best Solution to Change Video Resolution
The first thing that comes to mind when trying to adjust video resolution is to seek help from video editors. But there are just too many video editors out there. You can google it and there are probably hundreds of different products out there for you to try. If you are going to download them one by one, see if they are what you want them to be, that process can take up too much time, and you’ll probably end up getting bored and settling for whatever doesn’t work for you.
Well, with a thorough comparison between various video editors on the market, we have to say, WorkinTool Video Editor – VidClipper wins.
It is a professional video processing software. With its clean and user-friendly navigation interface, you’ll quickly learn how to use it, and adjust video parameters like you have owned it for a long time. As a fully functional video editor, you can use it to add special effects, and background music, combine or cut video clips, and so on. here is how to use this amazing tool.
🔎 How to Use WorkinTool VidClipper
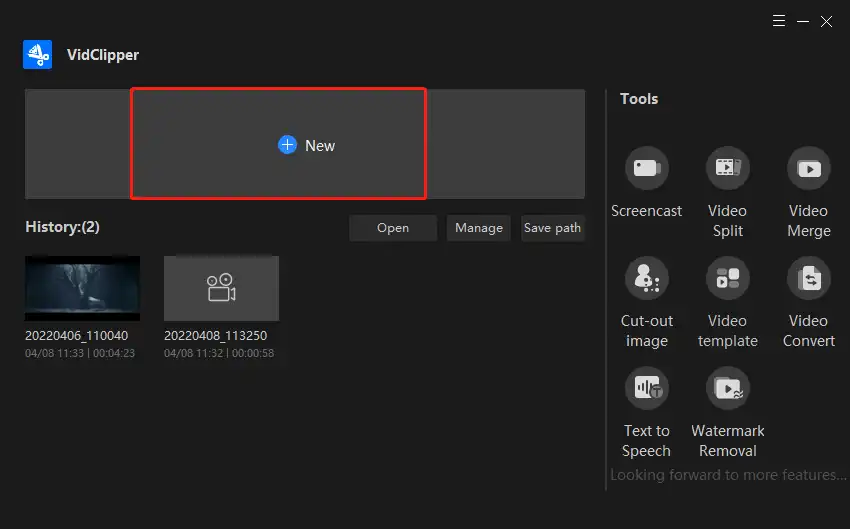
1. First, download and open it, click +New to get into the video editing page.
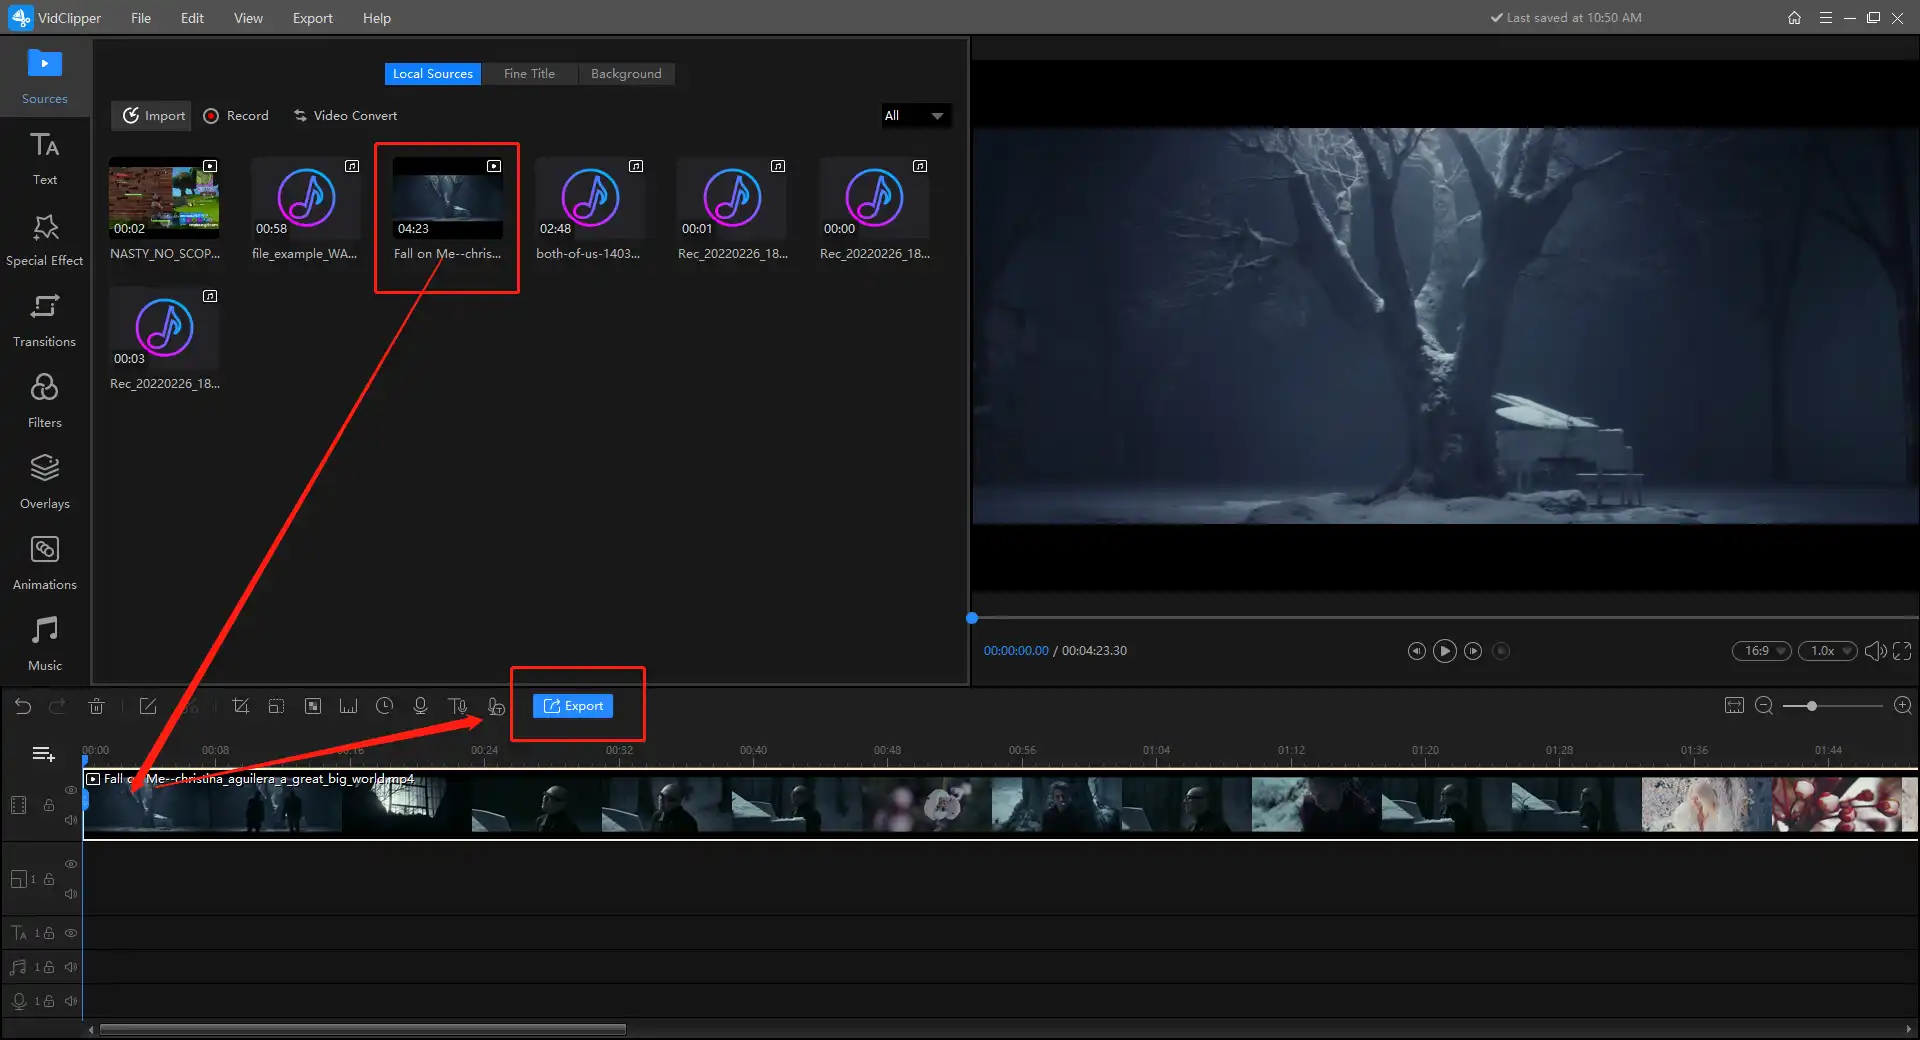
2. Import your videos and drag them to the timeline. Your video is now ready to be edited if you need anything. Tap Export to the next step.
3. Next, choose the video format you’d like it to be in. Then hit the Settings button to change your video resolution.
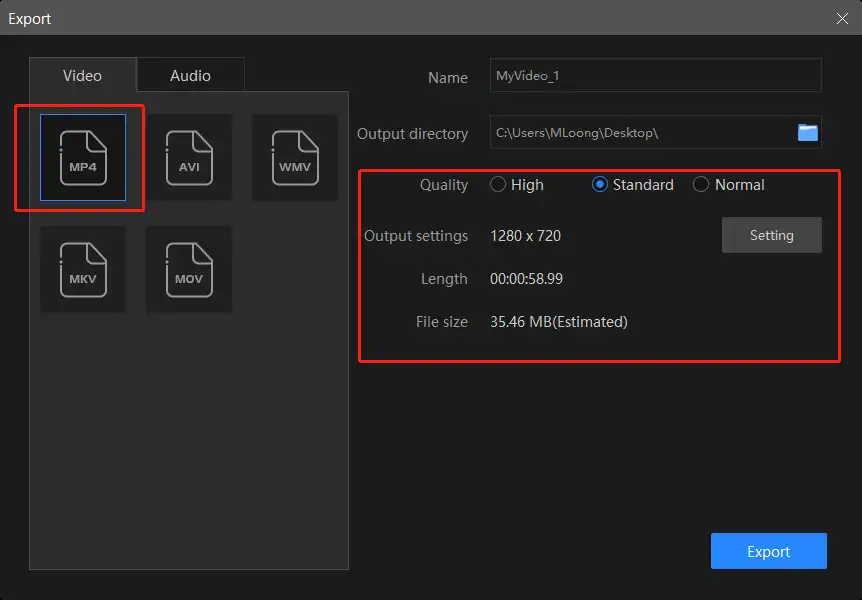
4. In the Export settings window, users are able to adjust specific video parameters. In addition to the resolution rate we have mentioned, here you can modify the video quality, encoder, frame rate, and bit rate. Once you have properly set them right, click Export to start the process.
For video resolution rates, VidClipper gives users the most freedom to customize. You can adjust this figure to range from 480P to 1920P. If you want a more advanced setting, there is also a custom option for users to enter the resolution manually.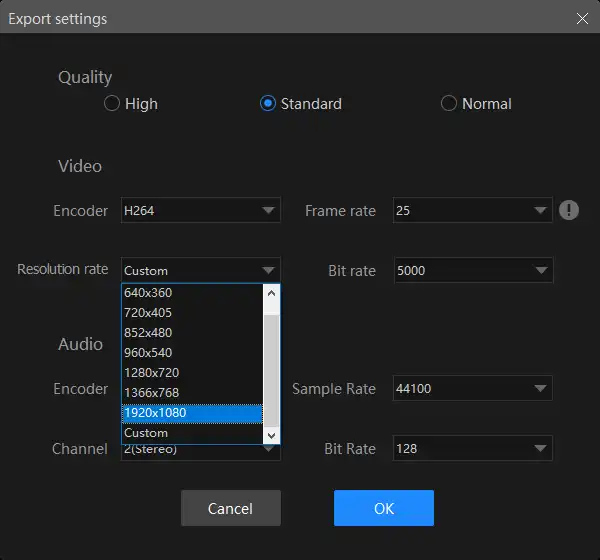
🎉 Why Choose WorkinTool Video Editor – VidClipper 🎉
We have mentioned that WorkinTool VidClipper is an all-in-one video processing software. In addition to altering the video resolution, users can also use it to do a lot of work on video editing. Here are some of the features you might be interested in. Of course, there are many more interesting and useful functions waiting for you to explore.
An Alternative Way to Modify Video Resolution
The second way is not to use a video editor, but to use a media player. VLC Media Player is what we want to introduce to you. As a free open-source multimedia video player, VLC is often used for video playing. Seldom has people know there is also a hidden function to change the video resolution in VLC. Because it is hidden deep in the video menu, it can be different to find if you are new to this software. Let’s see how we can make it work.
📁 The Hidden Function
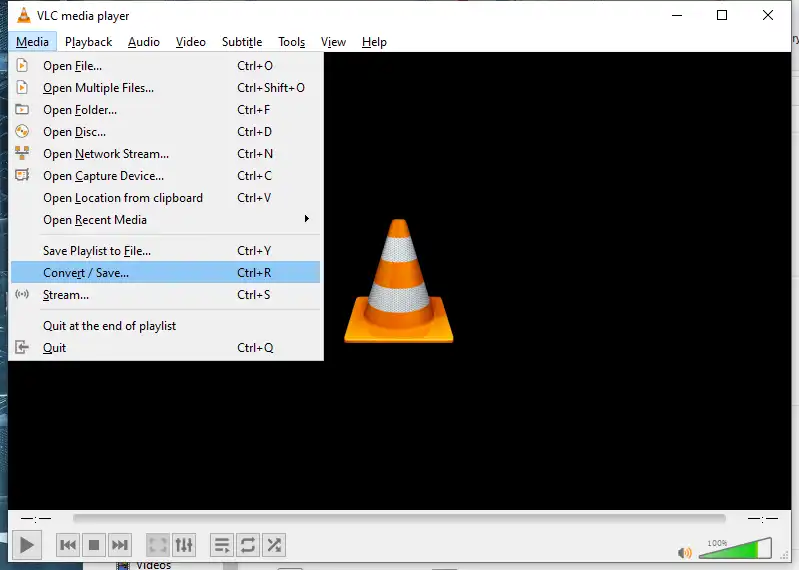
1. Go Media > Convert / Save…
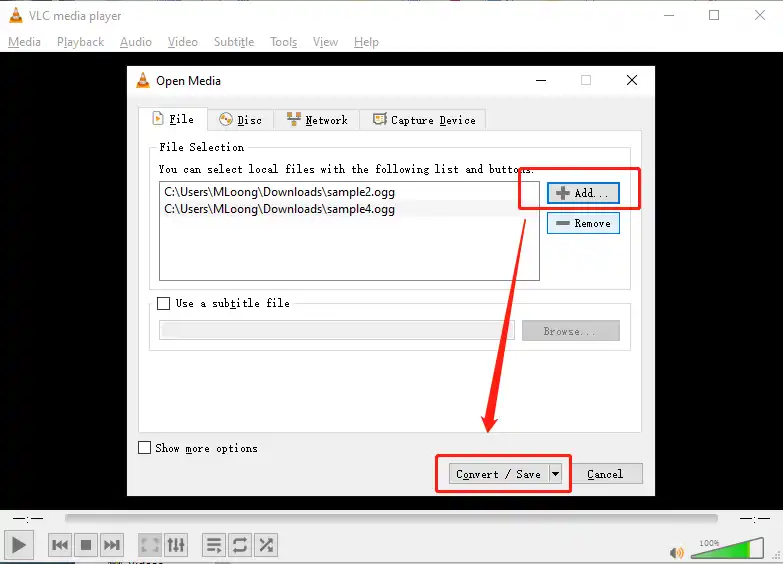
2. Then, click +Add… to input your videos and continue to Convert / Save.
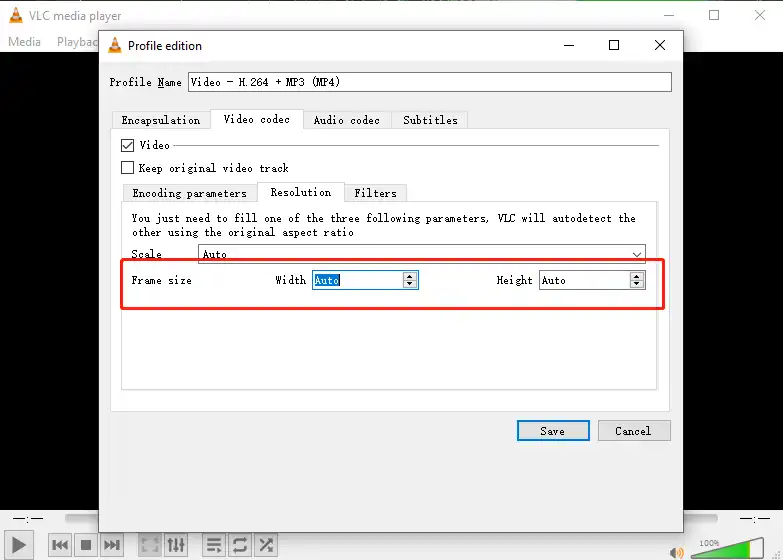
3. Next, find the wrench icon and tap it. This will lead to the profile edition page.
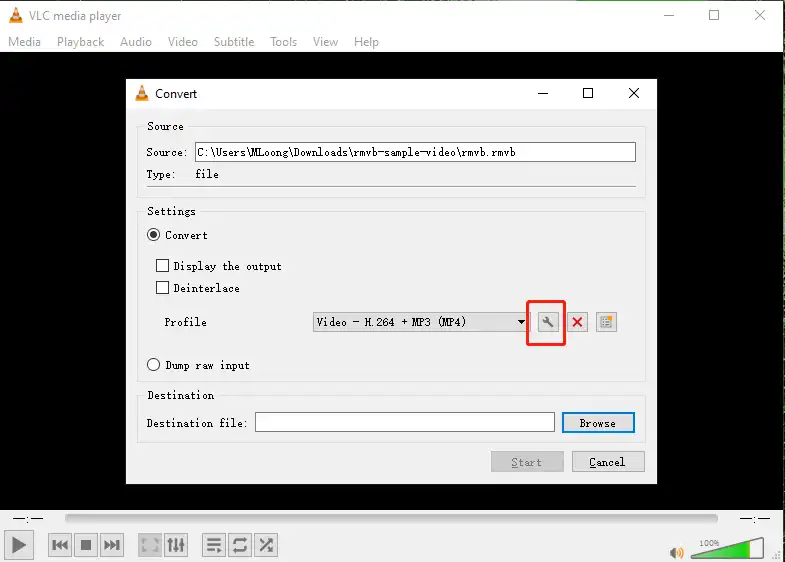
4. Here you can feel free to adjust the video resolution now. Go to Video codec > Resolution > Frame size to customize it.
The Third Option to Change Video Resolution
There is a third option for you to change the video resolution without downloading any third-party software. And that is to apply the built-in APP: Video Editor. If you can find it, go search for it on the Windows search bar. They can help you do some basic video editing jobs. This includes changing the video resolution.
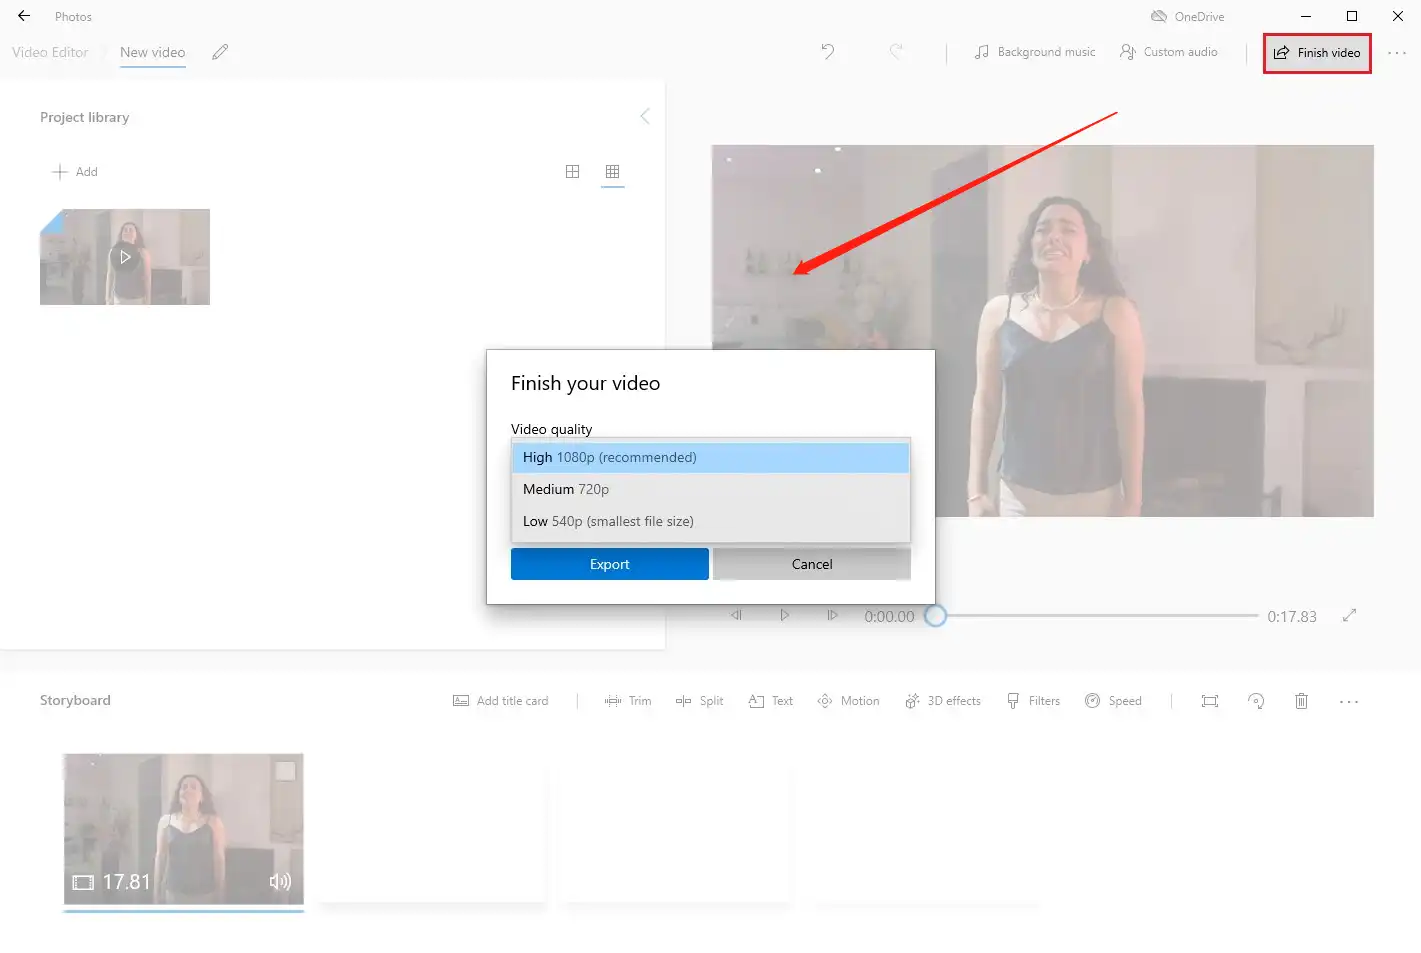
The reason I didn’t put it at the top of the list is that, though it can change video resolution, the options are very limited. Users are not allowed to customize the specific width and height of the video. But it is enough for people who only want to change it.
📌 How to Make It Work
1. First, open it and set up a new video project. (An old one is also ok)
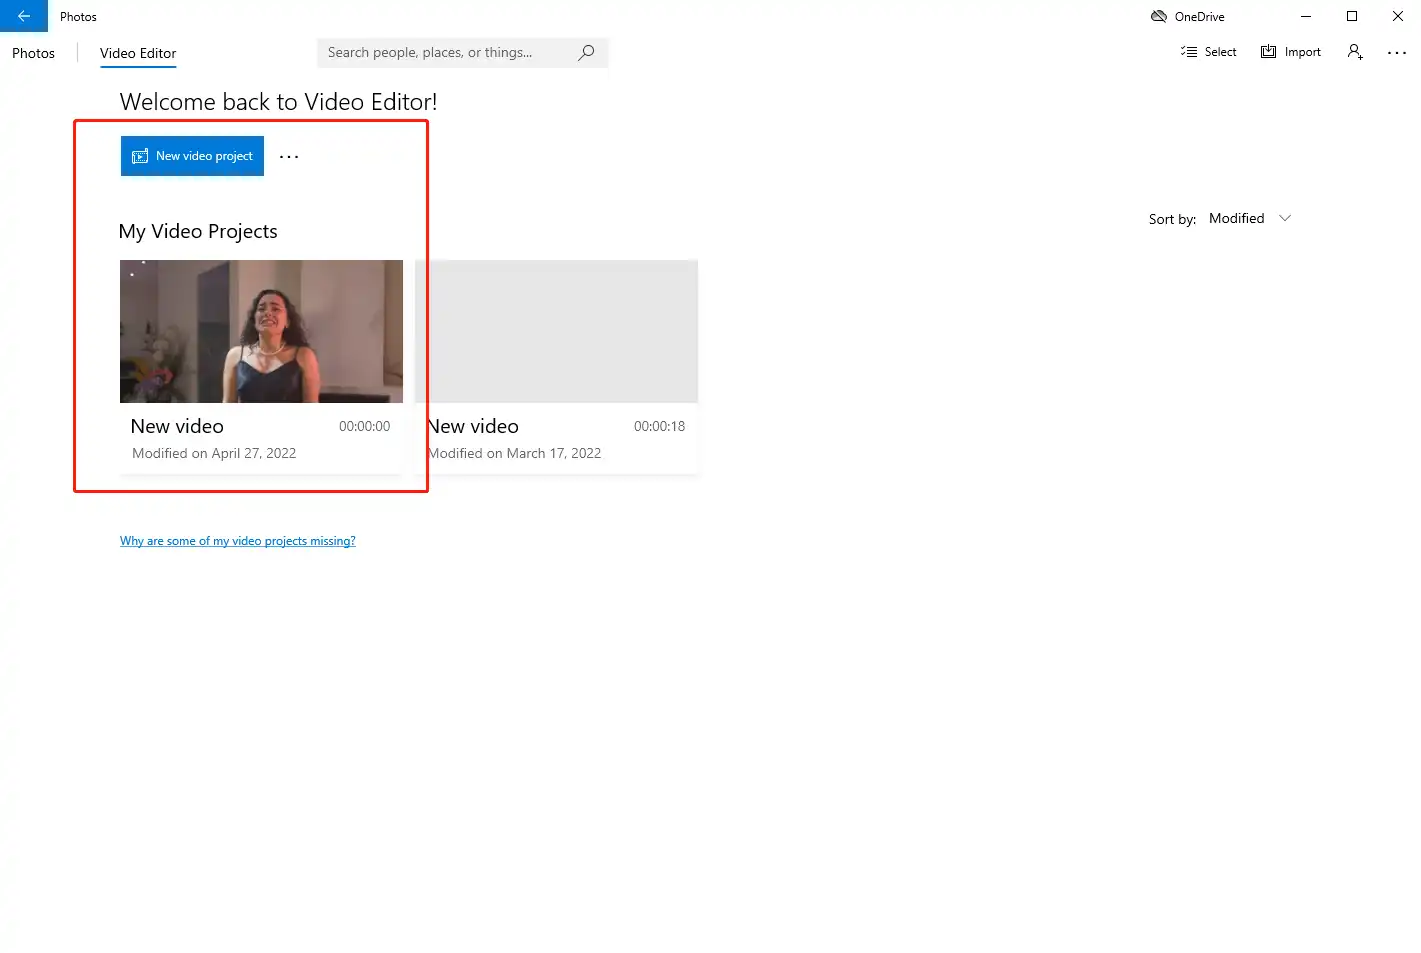
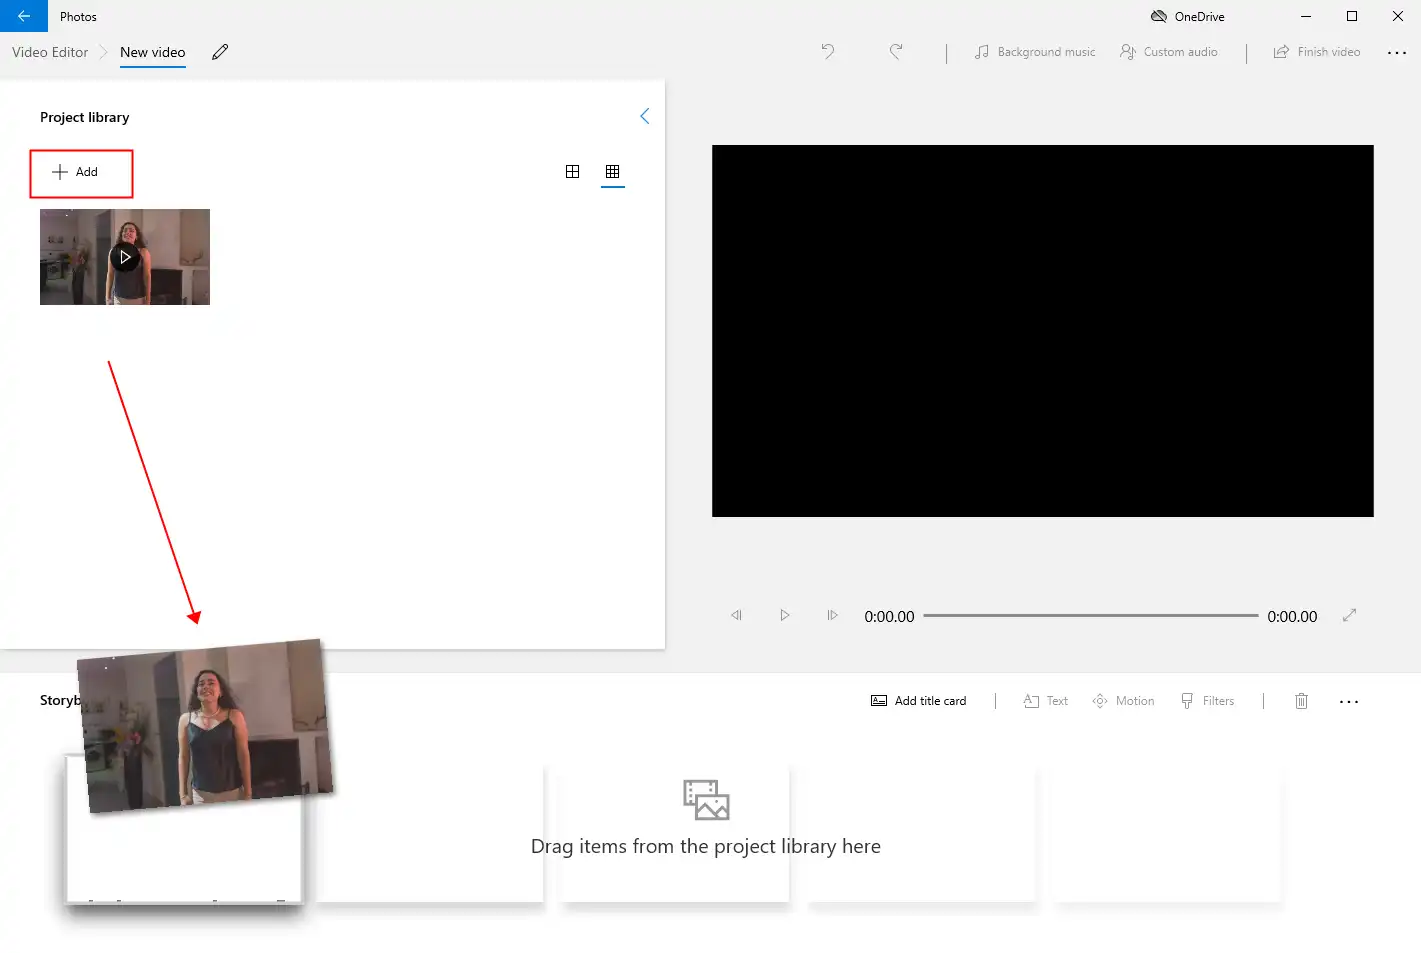
2. Then, click +Add to drag it to the timeline.
3. Lastly, the most important step. Tap Finish videos and then change your video resolution there.
What is the Resolution
Let me put it a simple way, the resolution is how big a screen you can play the video correctly. It’s often expressed as width x height. But the width and length are represented by pixels.
📌 Typical Video Resolutions
4320P and 2160P aka 8k, 4K
These two resolutions are the highest video resolutions available. It’s usually on TV or at the movies. Similarly, the higher the separation rate, the higher the cost. 4K TV sets are slowly becoming popular.
1080P: 1920×1080
The most compatible resolution is 16:9 for the most widescreen videos. Also called FHD resolution, it is the best ratio for most video platforms.
720P: 1280×720
720P is the most suitable high-definition resolution for television channels. It is also a 16:9 aspect ratio before the 1080P.
480P, 320P
There are also 480P and 320P that are used in the old DVDs. But now, due to their low definition, few people would deliberate to select them.
Conclusion
Overall, we have covered three different methods to help you change the video resolution. Though they are all free to use, WorkinTool VidClipper is obviously the best way for users compared to the other two. It doesn’t require the user to dig into its settings screen to find the ability to change the resolution, but it also gives the user the freedom to customize the resolution.
Why don’t you have to act? Download it now and try the magic yourself.
