How to Compress Pictures in PowerPoint 2024
We all know that creating a PowerPoint presentation means that a lot of pictures and photos will be involved, especially it is for trade shows and business conferences. This could lead to a problem with the PowerPoint file becoming extremely big in size. The reason for this concern is that there are too many images and the quality is too high, higher than one needs to show on the screen for a PowerPoint display. So, what do we do? We compress pictures in PowerPoint.
In this article, we will focus on how to reduce photo size in PowerPoint and an alternative to it. Use a free and practical file compressor – WorkinTool File Compressor for lossless compression of images and add them to PPT documents. Or complete a PowerPoint document and compress it. I guarantee both ways will satisfy your demands.
The Traditional Method to Compress Pictures in PowerPoint
While too many pictures can cause a PowerPoint file to get too large and slow, the good news is that this is a great solution to it.
Luckily, PowerPoint provides a great compression built-in function that can help users compress all images in the presentation as one of the operation steps. It compresses images primarily by reducing the resolution. Users can choose according to their needs. Now, let’s see how to make it work in Microsoft PowerPoint.
⭐ Simple Steps to Reduce the Size of Pictures in PowerPoint
1. First, open a PowerPoint presentation that includes pictures. Or, you could open an empty PowerPoint file and insert your pictures (Menu > Pictures > This Device).
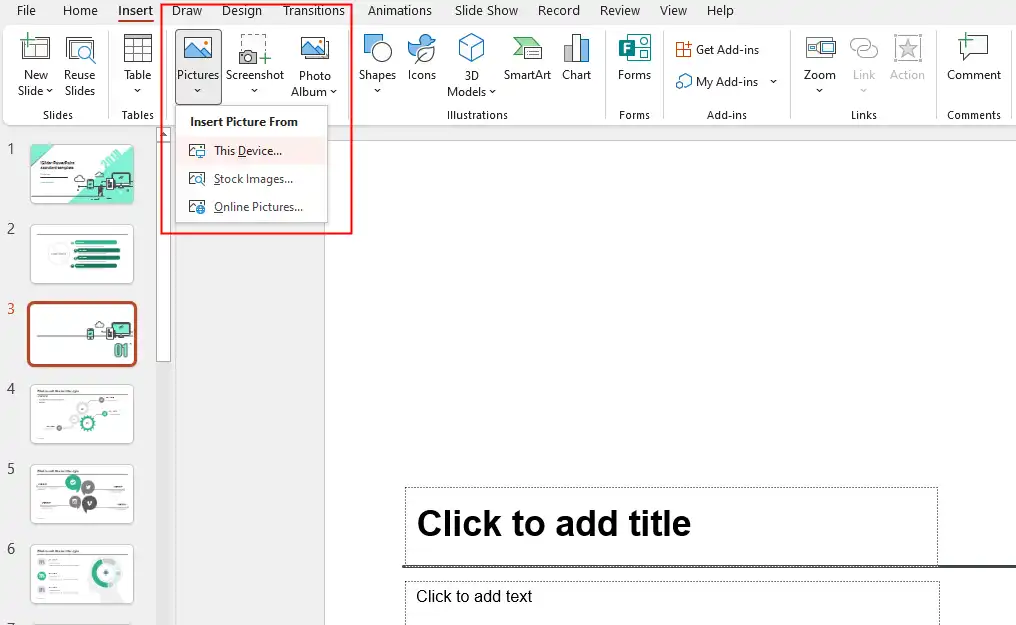
2. After that, please select Picture Format.
(If you don’t see this option, it’s probably because you didn’t click the inserted picture first.)
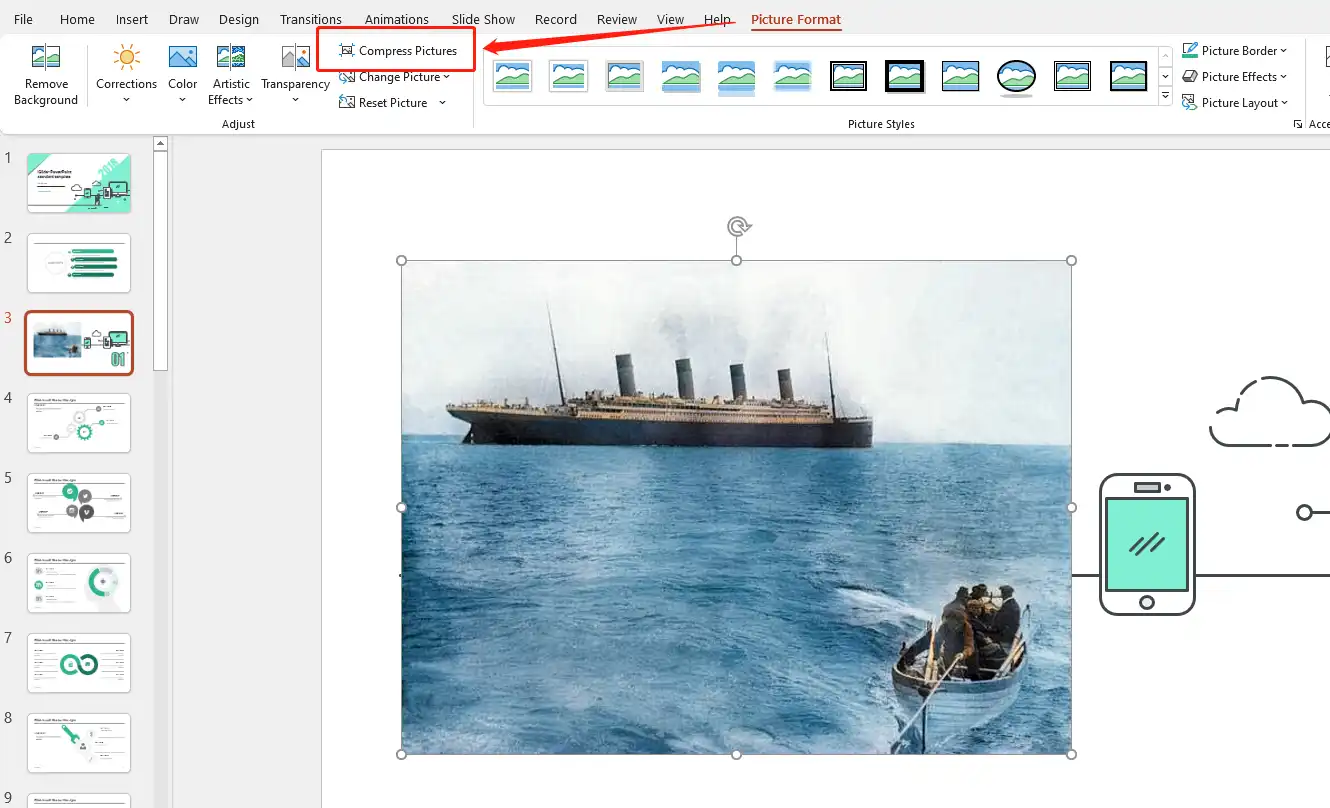
3. Next, click the Compress Pictures button under the Picture Format option, and a compressed picture adjustment box will pop up on this slide.
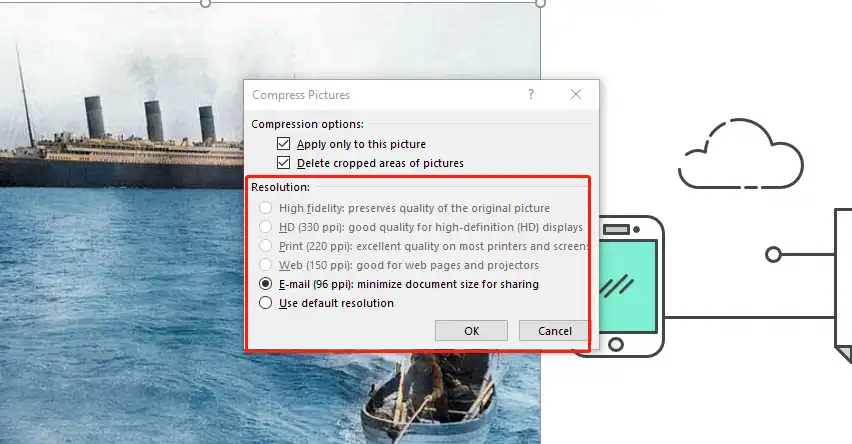
4. Last comes the most important step. You need to decide on a resolution now. Normally, E-mail (96 PPI) is more than enough. However, if you have other plans, you can pick a different resolution to apply. Each option corresponds to a scenario requirement, and users can pick a different resolution to compress according to their needs.
After selecting, click OK to complete the image compression.
📣 Notice:
- Make sure to check if you have clicked Apply only for this picture. If you have missed it, then all of your images will be compressed in the same way you have just adjusted. Of course, you can uncheck this option to compress multiple images in the same format.
- Another option button you need to check is Delete cropped areas of pictures. Once you have selected this checkbox, all unnecessary cropped areas will be automatically deleted.
An Alternative Way to Compress Images – WorkinTool
There are other ways to make a PowerPoint file smaller than it should be, other than compressing the images in it. So here I would like to recommend you a third-party compression software – WorkinTool File Compressor. It is a professional file compression software that provides a free trial for all users. It supports the compression of images, videos, and various office files. So, you can choose to use the software to compress the image before inserting it into a PowerPoint presentation or to compress a completed PowerPoint document directly. Both methods can be easily accomplished using this specialized software.
🎯 How to Use it to Shrink an Image
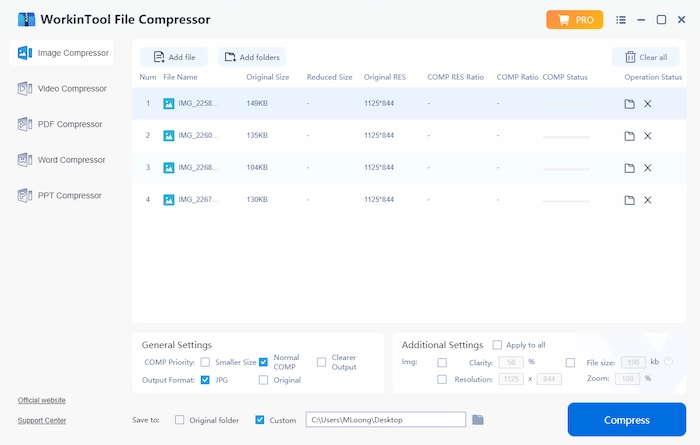
1. Download this amazing tool first and launch it to find Image Compressor on the main page.
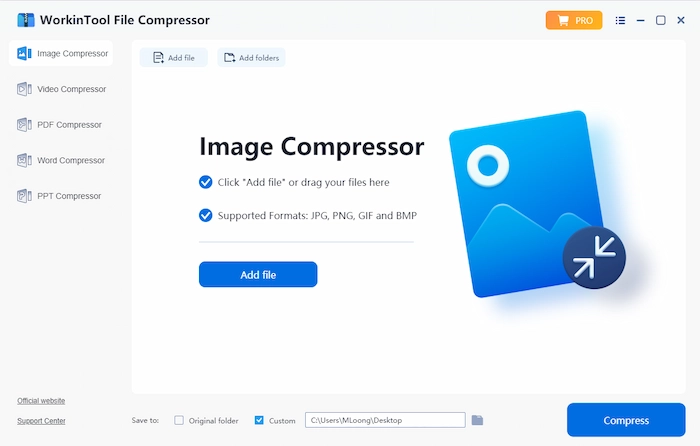
2. Then, add your prepared pictures to this file compressor. You can add a single picture or add an entire picture folder.
3. Next, you need to adjust the compressed options. There are two different sections for users to customize their picture compression.
- General Settings: For users who don’t have a specific compression request. The three compression priority options are to pick – Smaller Size, Normal compression, and clearer output. Furthermore, users can pick to convert all images to JPG format.
- Additional Settings: For users who know exactly how much they want their pictures to compress. Here, users can adjust the clarity, file size, resolution, and zoom of the image.
4. Lastly, after you have made those adjustments correctly, click Compress to start the process.
💡 How to Use It to Compress a PowerPoint Document
1. Same as before, you launch this tool and find the last feature PPT Compressor. Right here you can directly compress the PowerPoint document, which saves the trouble of compressing the picture.
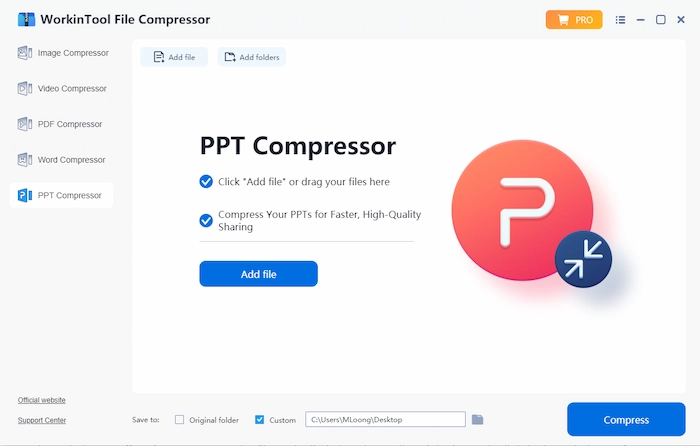
2. Click Add file to insert your PowerPoint documents in it for later compression.
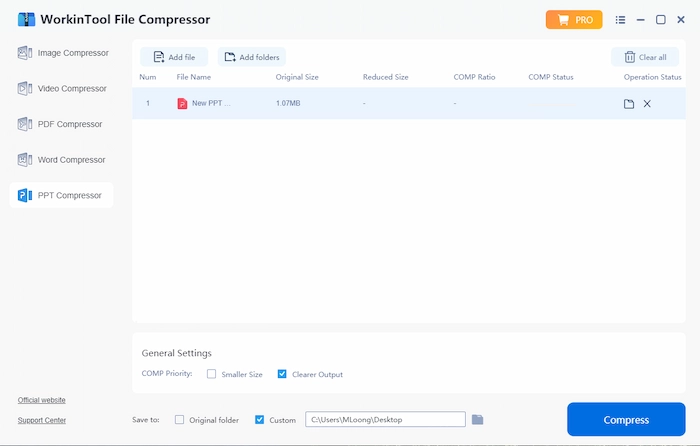
3. Then, choose a compression priority. Smaller Size compresses the file to the limit, but the image quality is slightly degraded. For Clear Output, on the other hand, the focus is more on preserving the quality of the image, and the size of the compression may or may not vary too much.
More to Share
After this professional tutorial on how to compress pictures in PowerPoint, I am sure that you have grabbed the method to get the job done. As you can see, it isn’t hard. And, of course, except for the built-in compression feature in PowerPoint, the third method – WorkinTool File Compressor can offer users more options to adjust the picture size. The built-in batch conversion also leaves users with a lot of time to do other important things. It can even help users directly compress the finished PPT file, and no longer need to deal with the picture.
Join us now. It is your turn to try these functions above.


